We respect your email privacy

Photo of the WEEK

Jared Polin September 6, 2010 4

I wanted to do something a little different for this weeks photo of the week. I wanted to add to the fold how I edited the RAW file to get my black and white final image. I think it is very important to show you the whole picture, the story, the settings and the tweaks to the RAW file.

Take a look at this video to get the story behind this image!!

20100831_adamreiver_107

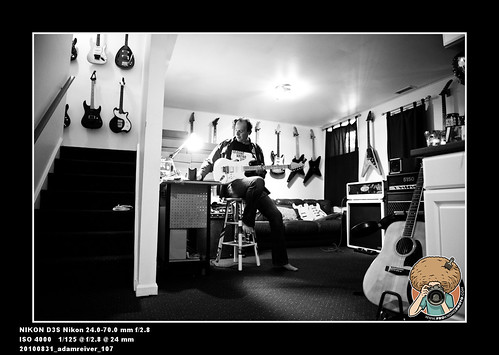
Nikon D3S Nikon 24-70 2.8
1/125th @ F/2.8 4000 ISO
NOT CROPPED SHOT RAW

Please Share and Enjoy:
  • Digg
  • StumbleUpon
  • del.icio.us
  • Facebook
  • Yahoo! Buzz
  • Twitter
  • Google Bookmarks
  • email
  • LinkedIn
  • Reddit
  • Tumblr

4 Comments »

  1. Anthony September 6, 2010 at 2:49 pm -

    Fantastic explanation and great insight on how you made this shot. Excellent!

  2. Steve September 7, 2010 at 2:16 am -

    Thanks for going through your LR work & explaining along the way. Very nice image as well. :)

  3. Gizzy O'Toole September 7, 2010 at 9:45 am -

    awesome video. The subject was great! Its cool to see your moves in LR.

  4. Alberto September 24, 2010 at 8:50 am -

    Nice video, as always. I like that you are not putting hours of work to get to the final image.
    In lightroom there are a couple of ways to turn a photo to black & and white. Why did you choose to completely desaturate it instead of using the HSL/Color/B&W pane?
    Is this your usual choice to turn a picture into black & white?