Introducing FroPack 3
15 Custom Lightroom Presets
Your Price Today: $50


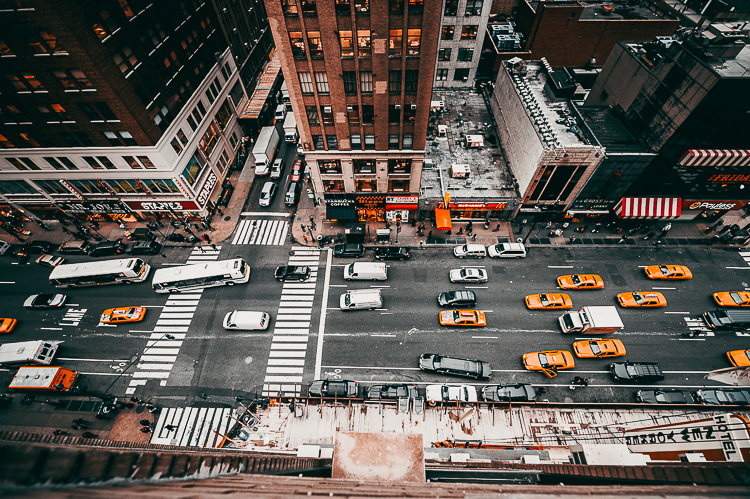
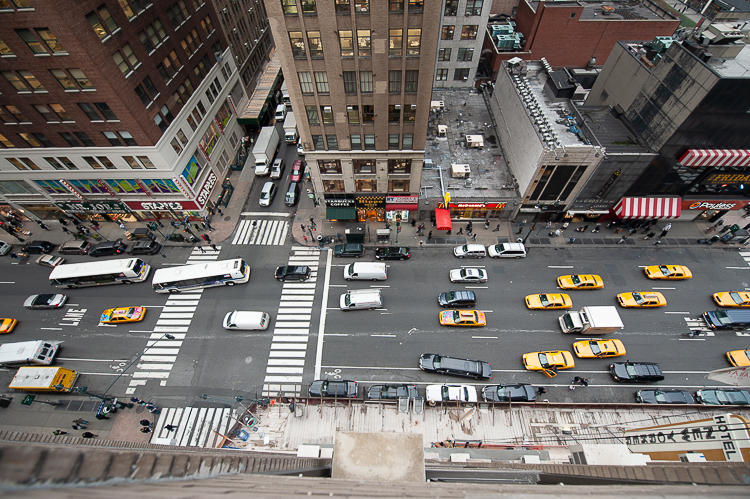
Gotham
The mighty metropolis of Gotham features hints of neon orange, deep reds, slate grays and dark undertones. On the flipside, it also includes subtle hints of fun, playful bright colors, because in the end— why so serious?!
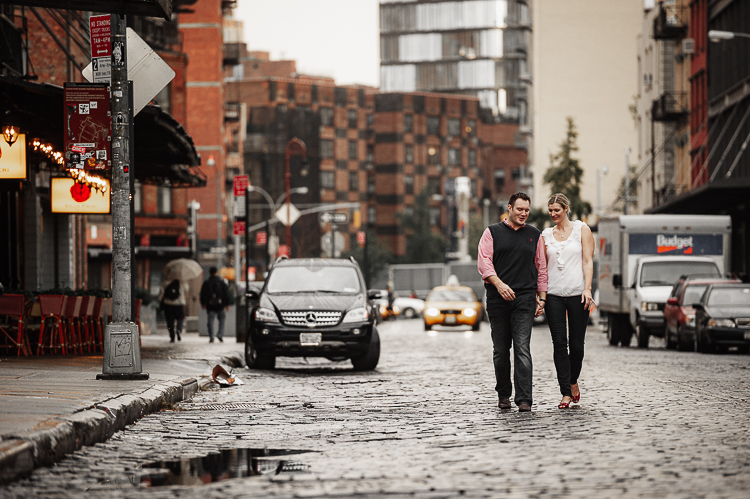
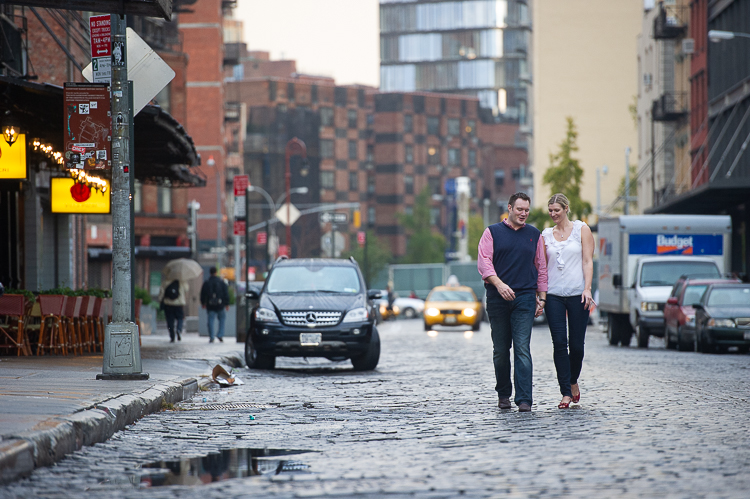
Capone
The roaring twenties were just as colorful as this muted preset. Besides skin tones, Capone will rip the color right out of your image, for a nice desaturated modern finish.
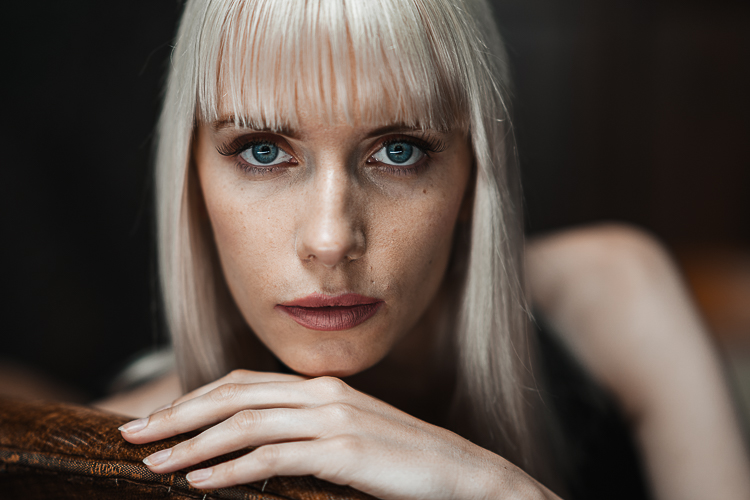
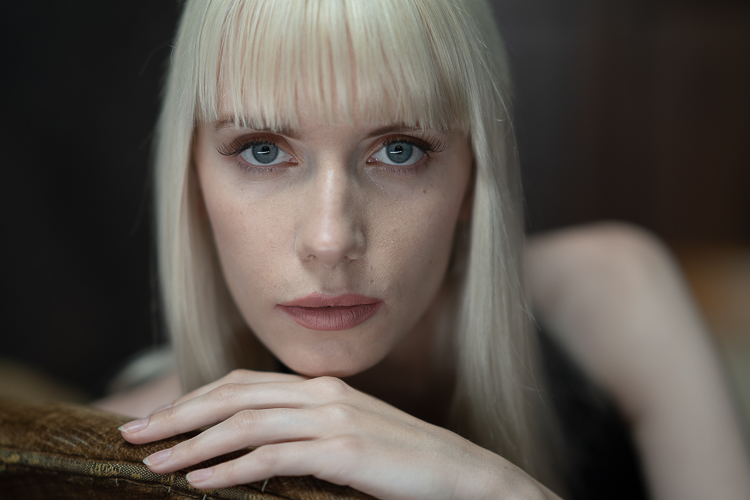
5th Element
Grab your multipass and become the 5th Element with this earthy preset! With a mix of deep forest greens and Egyptian tones, this preset will work wonders on both portraits and landscapes!


Mount Airy
Desaturating and brightening greens along with a high-key finish, this light & airy preset is so powerful, we decided to coin it Mount Airy!
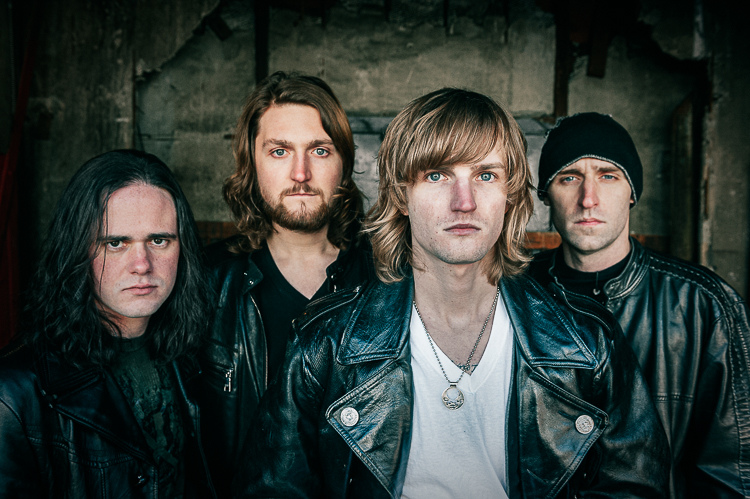
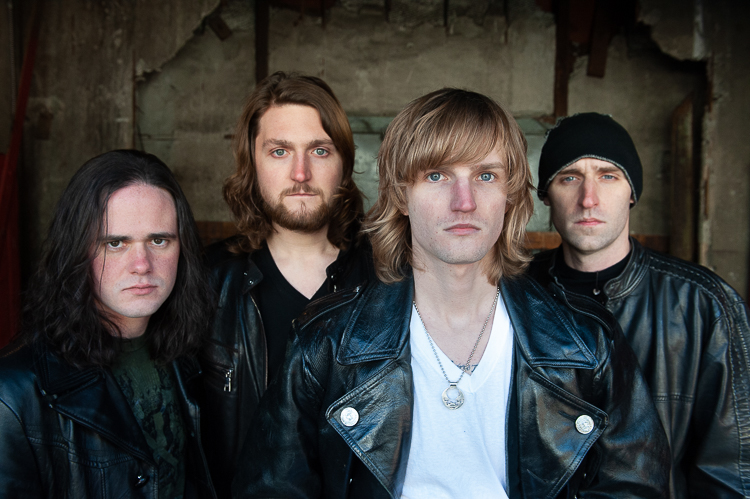
November Rain
This dark and moody preset will turn any happy image into an angsty teenager at a high school Prom. November Rain will fill your image with cold tones accompanied with dark green and teal split toning.
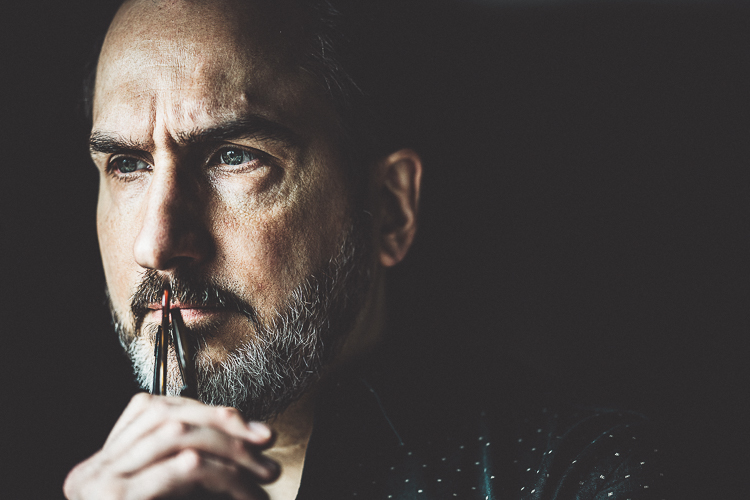
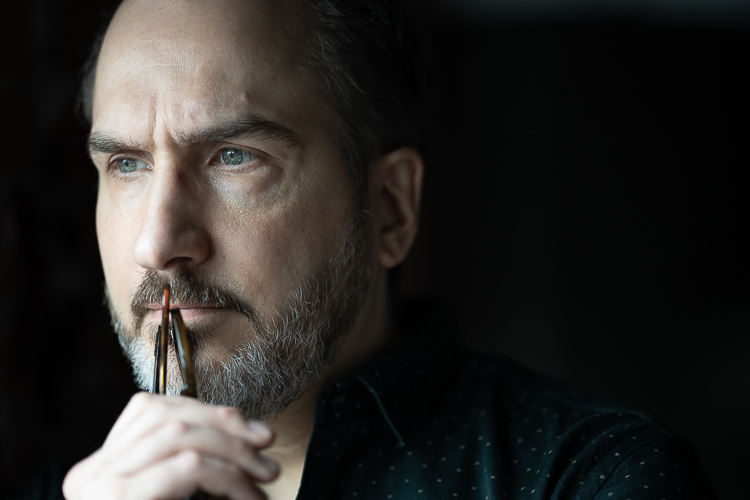
Almost Famous
Transform into the calm, cool, collective Lester Bangs with this film-like blown-out preset and become Almost Famous. Matted blacks and deep grain will turn your digital image into film, and you into a Golden God!
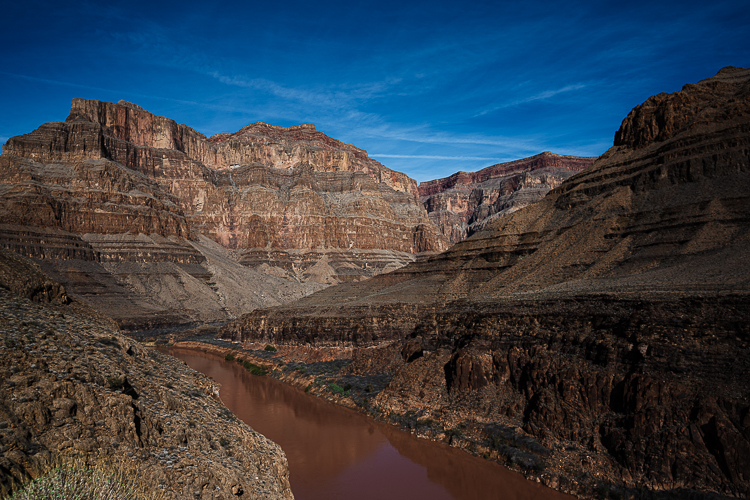
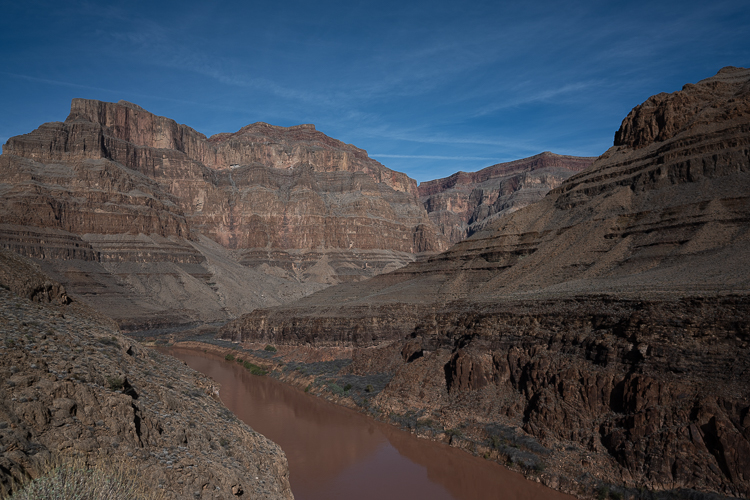
Prestige Worldwide
Sail around the world and go port to port with Prestige Worldwide. Perfecting your image with a single click, this preset is perfect for those that want to achieve a proper, vibrant edit!
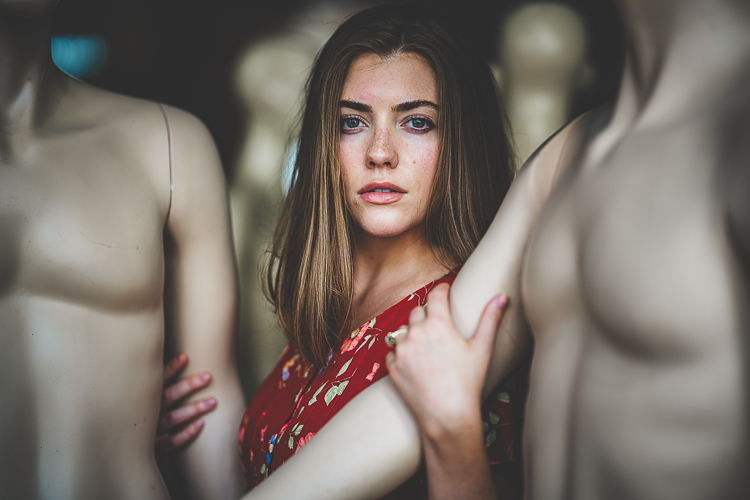
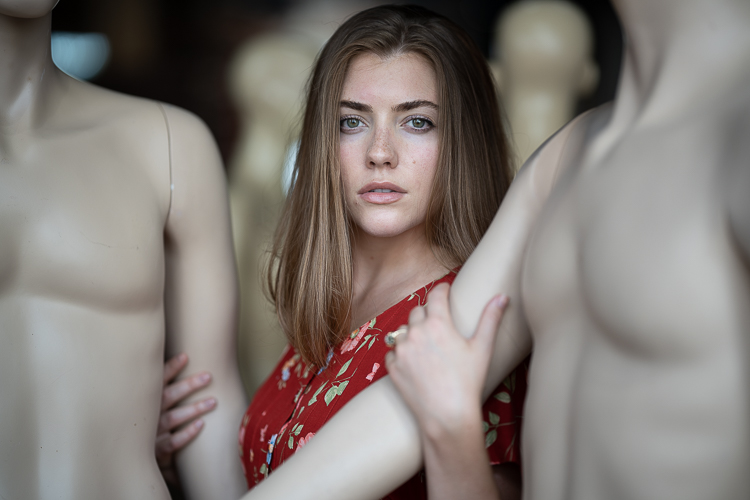
Eckert
We named this preset after Stephen Eckert, who created these presets—this one was his favorite. Enough said.
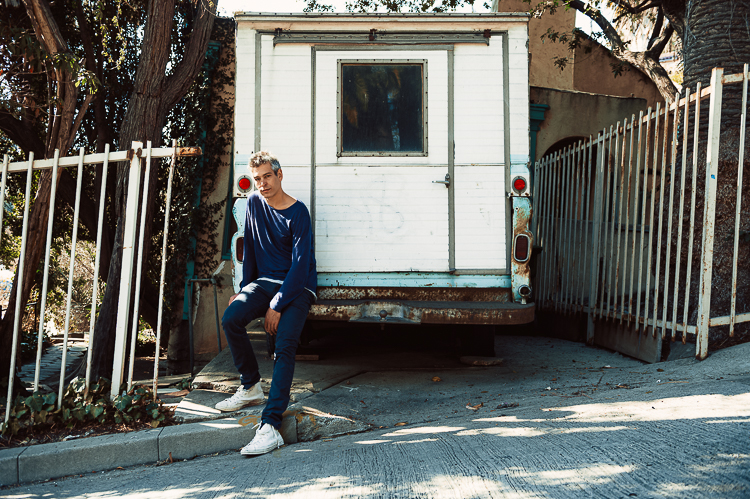
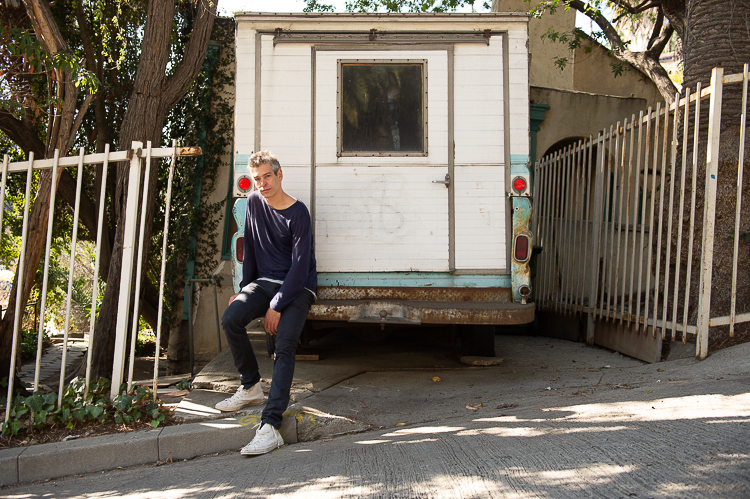
Winnebago
Start the engine and head into a world of deep browns and blue accents with Winnebago! This preset is sure to turn any photo into a rustic, vintage image.
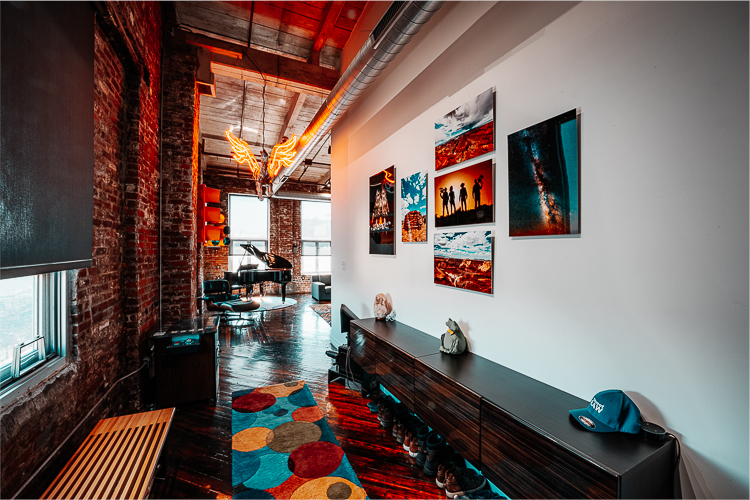
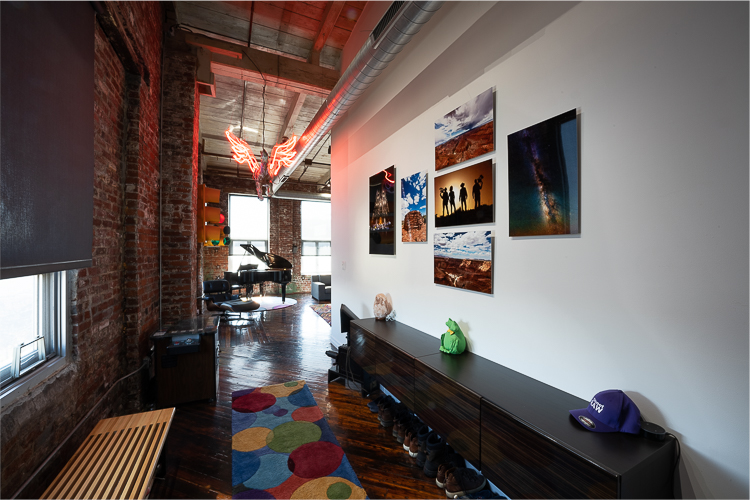
MDMA
Bust out your neon attire and glow sticks and get ready to party with MDMA! This preset blasts your image with bursts of crazy colors from all parts of the rainbow, making you wish you were at the rave, and not editing your photos!


Mentos
Fresh and full of life, Mentos softens and cleans up any image, turning it into a bright, light & beautiful photo!
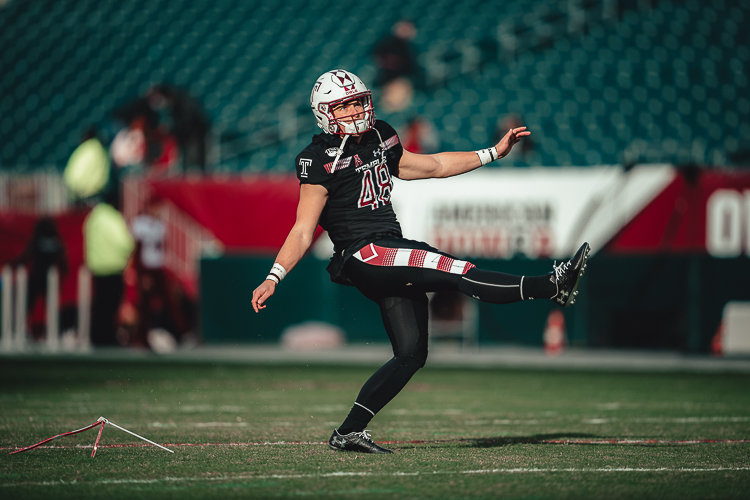
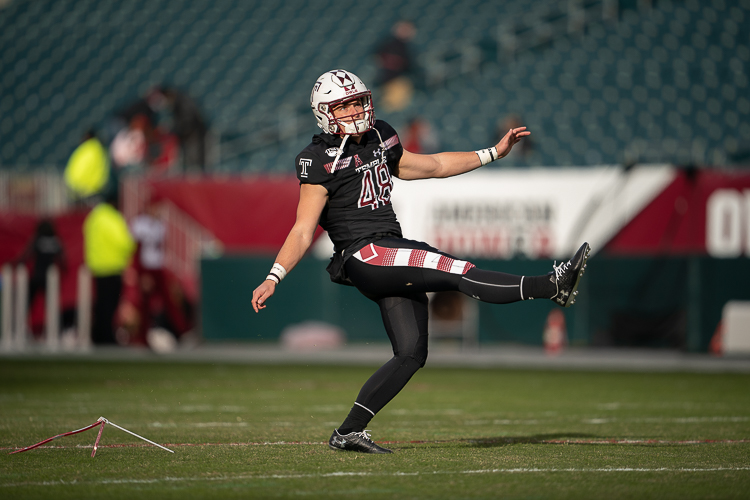
Zoolander
Zoolander will transform your image into a really, really, ridiculously good-looking photo! With blue-green and magenta undertones, it will make your image shine on the runway!
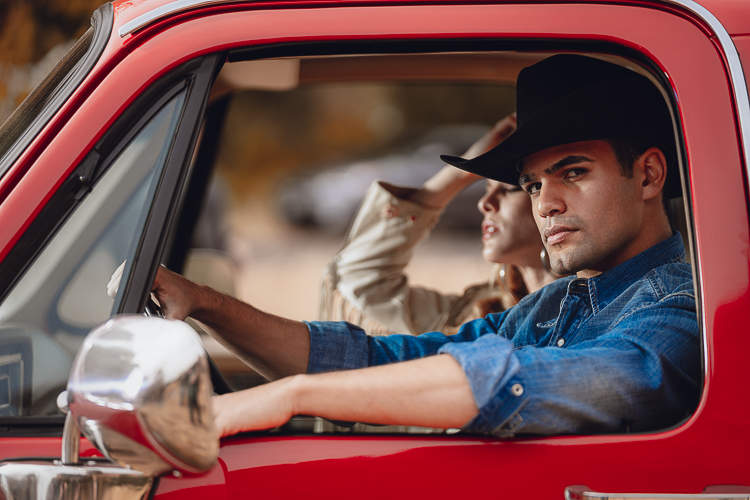
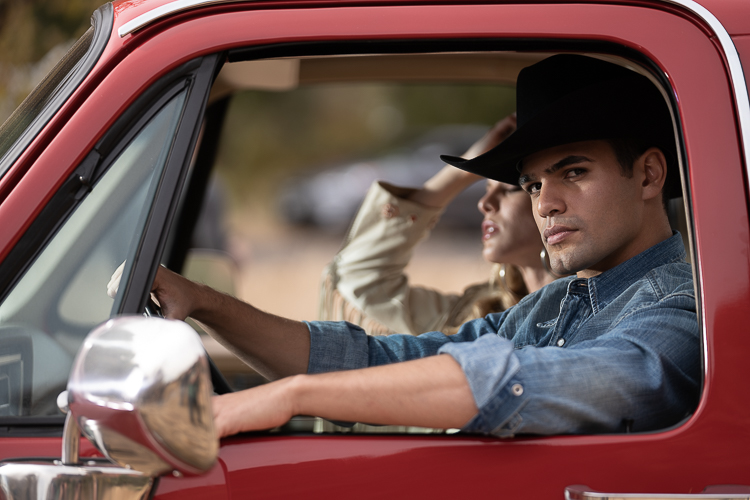
Canadian Tuxedo
Dust off the denim jacket and wear it proudly after applying Canadian Tuxedo to your image. This preset is all a-boot cold tones, sending an avalanche of blue colors right at your photo!
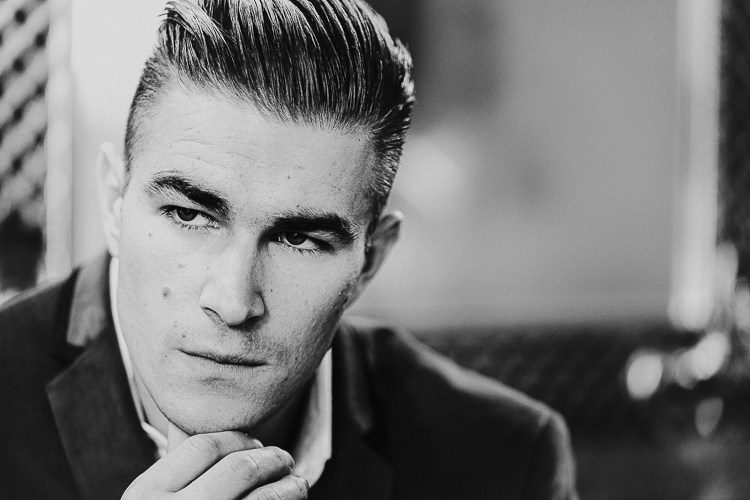
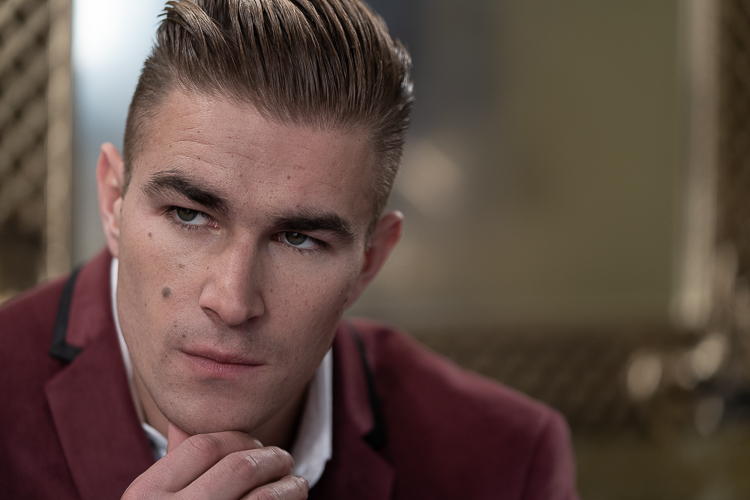
Walter White
Tread lightly with this preset folks. Walter White will take your plain-jane photo and cook it up into a science experiment filled with creamy whites and muted blacks.
King Contrast
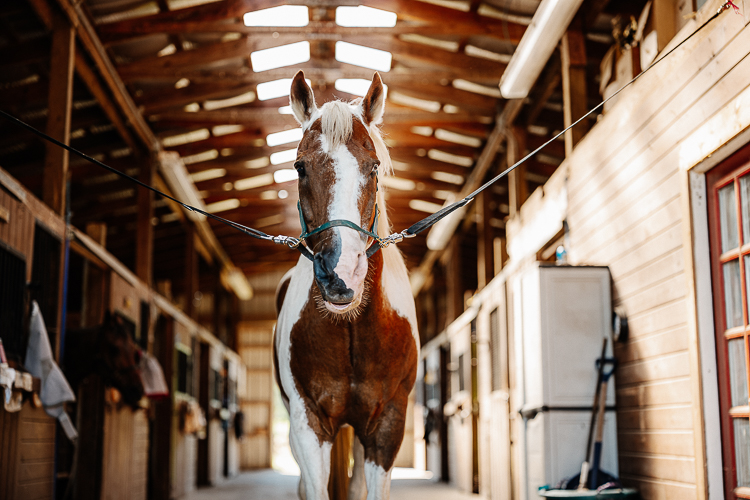
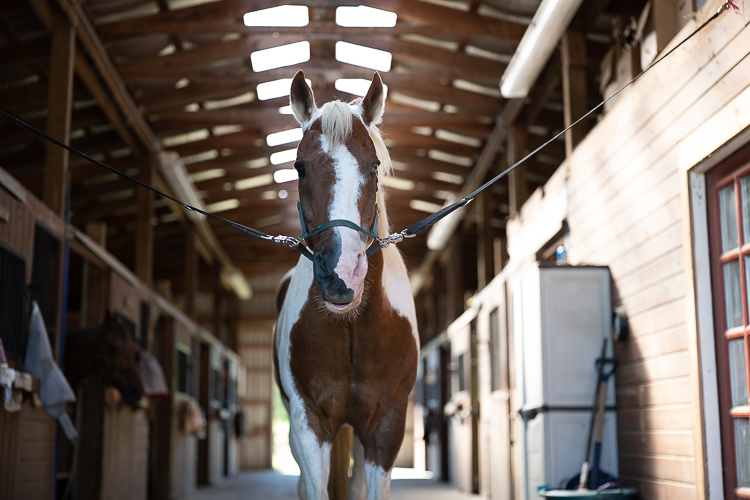
All hail the king! King Contrast will turn your flat RAW file into an all-mighty extra crispy image. The beauty of this powerful preset is that it will punch your photo with contrast, but will also play nice on skintones!
FroPack 3
(15 Presets)
Sale Ended
Yours Today: $50
(Regular Price)

The All-Star Bundle
(75 Presets)
Normally: $300
Best Value: $150
(75 Custom Presets!)

FroPack 1, 2, 3 & 4
(58 Presets)
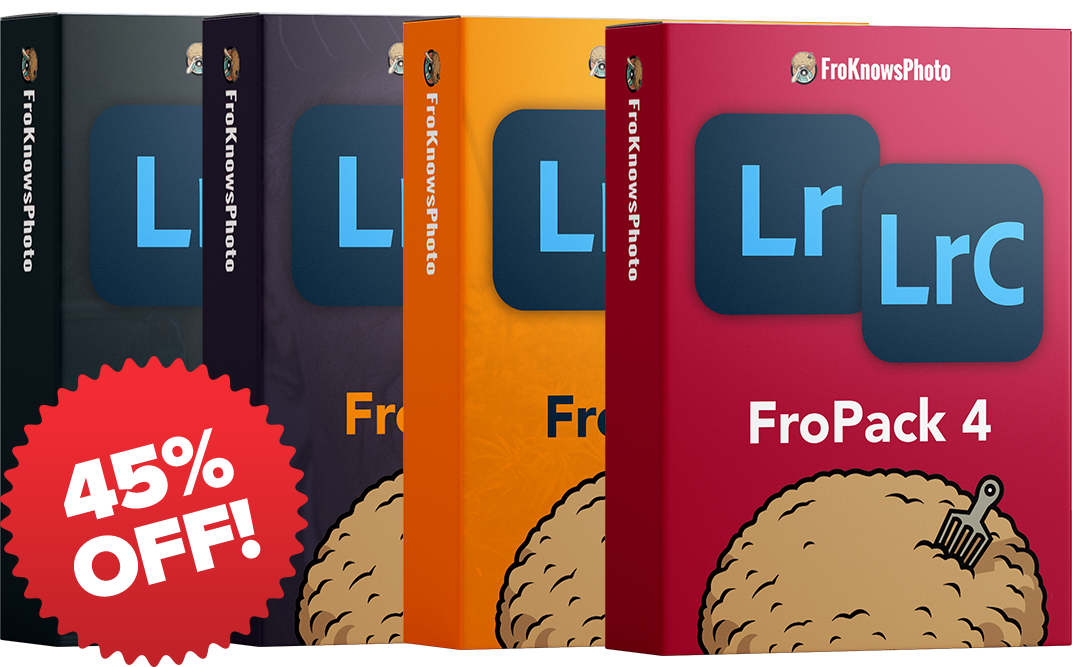
Normally: $240
Sale Price: $130
(58 Custom Presets)

Frequently Asked Questions
Q: What programs support these presets?
A: These presets were specifically designed for Lightroom Classic, Lightroom (Desktop & Mobile), Photoshop and Adobe Camera RAW.
Q: Will these presets work in Capture One?
A: No, these presets will only work in the Adobe suite of photography applications mentioned above.
Q: How do I install the presets into Lightroom Classic and Lightroom (Desktop & Mobile)?
A: Inside the “Develop” module (top right) in Lightroom Classic, click the “+” button that’s next to the presets folder on the left-hand side and select “Import Presets”. Next, find the ZIP file that includes the presets either on your desktop or in your “Downloads” folder and select it. In Lightroom (Desktop), click the presets icon (two overlapping circles) in the top right corner followed by the three dots in the Presets panel and follow the previous steps. In Lightroom (Mobile), if signed into the same account in both the desktop and mobile version of Lightroom and syncing is turned on, your presets will automatically appear in the presets panel. If you don’t have an Adobe subscription or syncing isn’t working, open up Lightroom (Mobile), click the presets icon (two overlapping circles) in the bottom panel followed by the three dots in the top right and follow the previous steps. Once installed, simply hover over the presets to view a preview and then click the preset you would like to apply. To adjust the intensity of each preset, see below.
Q: What are the best practices for applying a preset to a RAW file?
A: Adjust from the top down. Prior to applying a preset, it is best to adjust the image’s exposure and white balance first. These presets are based on ideal exposures and proper color white balance and will work best with this method. Exposure and white balance can simply be tweaked after the preset is applied as well, but the colors might be affected in a negative manner if the exposure or white balance isn’t correct.
Q: Will my image look perfect in one click?
A: If your image is exposed perfectly, it’s possible that it may look perfect with just one click. It’s best to adjust your photo accordingly to achieve the ideal exposure and white balance before applying a preset. Keep in mind, the goal of these presets is to give you a great starting point with your editing.
Q: Will your presets work with every photo of mine?
A: Presets are highly subjective. Not every photo will look good with all presets. Some presets work really well with only minor tweaks needed, whereas others are designed for a specific tone, color, or level of contrast, which means they may work for some photos but not for others.
Q: What if I want to quickly adjust the intensity of a preset?
A: In the top left-hand corner of the Develop module inside Lightroom Classic, there is an “Amount” slider that you can slide to adjust the overall intensity of the preset from 0-200, with 100 being the base level. You can also go in and adjust each individual slider on the right-hand side of the screen. This option is recommended for advanced users. In Lightroom (Desktop), the Intensity slider can be found directly below the preset once clicked. In Lightroom (Mobile), the Intensity slider can be found in the square preview to the left of the preset once clicked. Simply click the box to reveal the slider. Note that the Intensity slider on all platforms can only be adjusted when the preset is first applied. Any additional manual adjustments to the preset will dismiss the slider. Simply put, the Intensity slider evenly moves each preset’s slider adjustments back and forth in a negative and positive manner. It is not a perfect solution to tweaking the preset.
Q: Can I combine Adaptive Presets and Masks with standard presets?
A: Yes, you can apply a standard FroPack preset and then apply Adaptive presets and masks on top of it. It’s recommended to apply the standard preset first, and not the other way around.
Q: How do I adjust Adaptive Presets?
A: There are two ways to adjust the Adaptive Presets: You can either use the Intensity slider as outlined above, or you can adjust the individual masks by selecting the masking option (circle) in the Basic adjustment panel on the right-hand side. Here you can tweak each individual mask and turn them off or on.
Q: Will these presets work on JPEG or HEIF files?
A: Yes, these presets will work on JPEG and HEIF files; however, they were specifically designed to work with a RAW file format. If applying to a JPEG or HEIF image, the photo may appear to look “overcooked” and you may need to adjust the preset accordingly with the Intensity slider or manual adjustments as outlined above.
Q: Can I download the presets on my smartphone, tablet or mobile browser?
A: Yes, you can download the FroPack ZIP file and manually import them into the mobile version of Lightroom. Neither a desktop computer nor an Adobe subscription is required. See the installation and import methods above.
Q: Can I use your presets in Lightroom (Mobile) on my smartphone?
A: Yes, these presets will work on files taken with or stored on your smartphone. Note that they will work on JPEGs, but they were specifically designed to work best on RAW & DNG images. To sync the presets, you must be signed into an existing matching Adobe subscription on both the mobile and desktop version of Lightroom with syncing turned on. If an Adobe subscription is not available, the presets can be manually added to the mobile version of Lightroom by following the importing steps above.
Q: Do I need a paid Adobe subscription to use these presets?
A: No, the free version of Lightroom (Mobile) will accept these presets even without a paid Adobe subscription. See the manual import method above.
Q: How do I make sure I don’t save over your presets?
A: Make sure you don’t click “Update with Current Settings” when right-clicking a preset. If you like your tweaks, you can simply click the “+” button next to presets and “Create” a new preset based on your adjustments. You can even combine presets if you like certain looks from one, but colors from another.
Q: Why are there multiple versions of certain presets?
A: These are slight variations of the same preset. Everyone’s style and preference is different, so we made several variations of certain presets that include high contrast, low contrast, no grain, with grain, vibrant, muted, etc.
Q: Do I need to download the ZIP file to my computer first?
A: Yes, once you download the ZIP file to your computer you can then import the presets into Lightroom.
Q: Will this work on my standalone version of Lightroom Classic?
A: No, you need to be using Lightroom Classic v7.5 or later to install these presets. The standalone desktop version of Lightroom Classic v6.0 is not supported due to its incompatible legacy preset file format.
Q: I bought the preset pack but don’t see the download email. What should I do?
A: Please check the spam or promotions folder of your inbox. Allow 1-3 minutes for digital delivery.
Q: Can I return the presets after purchasing them?
A: The presets are non-refundable unless there are valid reasons. For example “I bought them twice by accident.”
Have More Questions?
Contact us at: Support@froknowsphoto.com
FroPack 3
(15 Presets)
Sale Ended
Yours Today: $50
(Regular Price)
The All-Star Bundle
(75 Presets)
Normally: $300
Best Value: $150
(75 Custom Presets!)
FroPack 1, 2, 3 & 4
(58 Presets)
Normally: $240
Sale Price: $130
(58 Custom Presets)