

Nikon D1X "5 Min Portrait" Photo Challenge: Using A 15-yr-old DSLR On A Professional Photo Shoot
The Challenge: use a 15-yr-old Vintage Nikon D1X and all authentic-era lenses to do a professional photo shoot.
Download Nikon D1X RAW Files: Click Here
Access all the FULL-RES exported JPEGS Right Here
A Fro reader sent in his Nikon D1X and thought it would be a good idea if I used it for a “5 Min Portrait.” I wanted to come up with something that was challenging and push my skills to the limit. Not only did I decide to do the photo shoot at a motorcycle garage that was dark. I challenged myself to use only of the era glass (2001 and prior). This means that none of my current “Hebrew trinity” lenses could be used.
I had to go to Allen’s Camera to hopefully find some used authentic-era glass to use on the shelf. I was able to pick up a bunch of lenses that would have been in a professional bag around 2001.
Lenses I Grabbed:
Nikon 17-35mm F2.8
Nikon 35-70mm F2.8
Nikon 80-200mm F2.8 AF-S
Nikon 85mm F1.4
Nikon 60mm F2.8 Micro
Keep in mind the first Nikon DX lenses were not released for another two years. I personally still had two lenses that were authentic-era in the way of the Nikon 50mm F1.4D and 16mm F2.8 Fisheye. The only lens I wish they had used would have been the Nikon 14mm F2.8 prime. This was one of the widest autofocus lenses that Nikon made. Keep in mind, the Nikon D1X is not a full frame sensor so every lens is multiplied on it’s body.
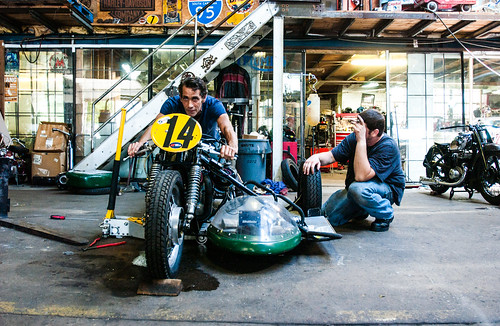
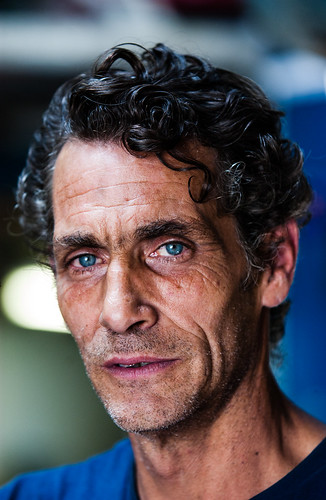
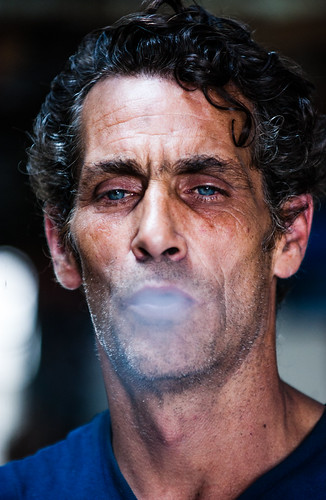
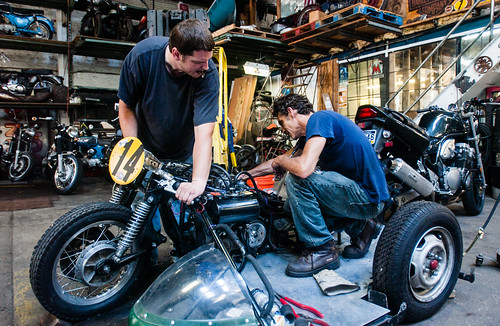
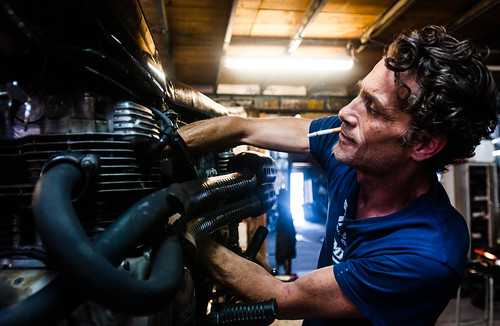
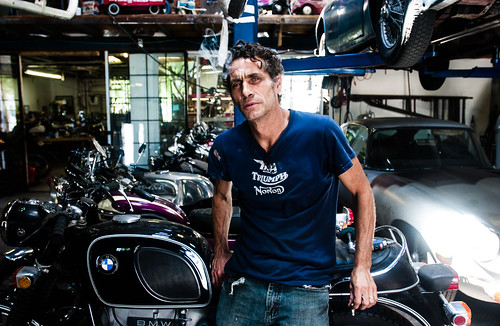
I chose to reach out to Adam at Liberty Vintage Motorcycles in the Fishtown section of Philadelphia to see if he would allow me to come in and shoot. He was on board as soon as I said FREE photo shoot in exchange for being our subject.
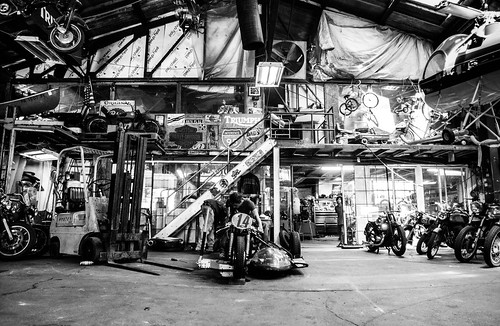
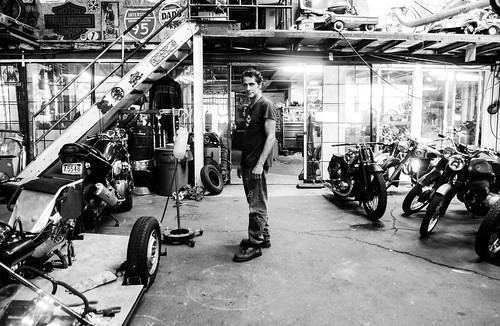
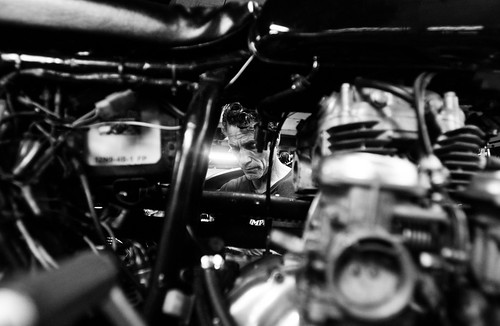
Here’s the scene: an old pretty dark garage with no air conditioning and hundreds of vintage motorcycles and parts. My challenge? Use what I brought to get professional photos.
Let’s take a look at some of the top level specs of the Nikon D1X:
Released in 2001 for a price of around $6,000
5.4 Megapixel CCD Sensor, not CMOS like today’s cameras
ISO 125-800, expandable two more stops but not recommended
2-inch (not very clear) monitor
3 Frames Per Second
5 Focusing Points
1.5x crop factor
1 Compact Card Slot
What you need to understand is back in 2001 this was revolutionary technology. In an era where film was still king, to be able to take a photo and instantly be able to see it was amazing. By today’s standard, we would say 125-800 ISO was limiting, but people generally did not shoot color film beyond 800 ISO (3200 black and white was common). Furthermore, having the ability to change the ISO each shot as the light changed was a god send. Prior to this, you would need to select a roll of film with the film speed you wanted to shoot and you were stuck with it until you finished the roll or decided to burn the rest and rewind it.
The Nikon D1X offered a 5.4 megapixel CCD sensor which for the time made it one of the highest megapixel DSLRs on the market. It was designed for portrait/studio shooters as well as wedding photographers. That of course doesn’t mean it could be used to shoot anything. Nikon also offered the lower 2.74 megapixel D1H which was meant for more high speed shooting. If you noticed, Nikon no longer uses the CCD sensors and has long-switched to the better-at-handling-noise CMOS sensors.
This camera was built similarly to the Nikon F5 which was the top-of-the-line film body at the time. You shot these cameras pretty similarly to how you would have shot film. The reason I say that is it wasn’t exactly easy to see the LCD screen to determine if you got the shot or not. Yes, on the 2-inch screen you could see that you captured an image and look at the histogram but it was fairly difficult to determine sharpness even when zoomed in 2x on the RAW file.
Here were some of my main concerns entering the photo shoot: Will the batteries hold a charge or would they die after five shots? Will I have enough ISO to shoot in a low light situation? Would the LCD give me a proper representation of the image I took? Would 126 shots on a 1GB card be enough to get what I was looking for? Will I hit focus or miss, being that I had only 5 focus points? Did I have the right lenses for the shoot?
As you can see there were a lot of challenges facing this shoot but the old rule is you work with what you have and it’s your job as a professional photographer to get professional results. That’s exactly what I set out to do and after a while you fall into a rhythm where the limitations of the gear float away and you focus on capturing the images in front of you.
One of the first issues I had was I thought the front command dial was broken which meant I would need to old school change the aperture on the lens. This meant I was stuck using full stops (2.8, 4, 5.6, 8, 11, 16, 22). I am used to having 1/3 stop increments like F3.2, 4.5, 6.3, so on and so forth. Luckily after digging around the old-school menu, I saw the front command dial was actually off and with one quick change I was in business.
I relied heavily on the wider 17-35 F2.8 early on during the shoot. It was the widest lens I had with me and allowed me to showcase a large portion of the garage as well as step in a little closer with some zoom. The problem was I couldn’t tell on the 2-inch screen if I was in focus most of the time. Even back at the computer it was hard to tell if I was sharp or not sharp but in the end I think I was sharp most of the time.
Did I shoot RAW, why yes I did. On a 1GB memory card you could get 126 RAW files which is close to 3-and-a-half rolls of 36 film. That was a huge deal back then but it came at a price. A 1GB CF card in 2001 would have cost around $800. The card I used for this shoot was the first CF card I purchased for my Nikon D2H and cost me $279 at Allen’s Camera back in 2003.
One of the main takeaways from this shoot is how you have to mentally slow down when using this gear. For one, the gear is slower, and two, you have to unlock the part of the brain you used to use back in the day shooting film. You have to think how can you cheat the system in order to compensate for lower ISO that’s not expandable. I talk about cheating the system all the time, underexposing–aka using a faster shutter speed–to insure sharpness only to bring back the RAW file in post.
I could go on for another 1,000 words about the challenges and success I had during the photoshoot but that’s why we filmed the process, so you can watch it in real time.
I do want to discuss the editing process and final images though. Being that I shot RAW I was able to import the files into Adobe Lightroom CC without a problem. Back in 2001 there really weren’t many programs that allowed you to open RAW files, thus why many photographers chose to shoot JPEG. Beyond that, we know storage was a concern as it was expensive to buy flash memory.
Once I started to tweak the RAW files I was surprised at how much leeway I had with them. If my exposure was off by a stop I could still bring it back and the quality of the image would hold up. This would not be the case if my exposure were not pretty close to being on. Like today, if I attempt to bring back a poorly shot, you will have a difficult time.
Something I had to remind myself of as I zoomed in 1:1 on my 27-inch iMac is people editing these files in 2001 would have been working on 13 to 15-inch CRT monitor. Pixel peeping was slightly different back in the day–it wasn’t as easy to do.
I did find myself zooming in on wider shots and questioning whether or not I failed at this shoot or not. I kept asking myself if I hit focus or I didn’t, I was getting stuck pixel peeping. The more images I edited the more I saw I was pretty much spot on with my focus. On a few occasions I did have some blur in the images which was caused by using a longer lens and attempting to hand-hold it at a shutter speed slower than my focal length. It’s one of those dances you need to tip-toe around when dealing with lower ISO’s.
The true test in my mind as to whether or not the quality holds up is to make physical prints. I used the Canon ImagePROGRAF Pro-1000 to unleash 17×22 prints into the world. As soon as they finished printing I said “WOW.” I said wow because they not only held up, but they looked fantastic. If I had someone look at the prints and ask what I took it with they would never have known it was a 15-yr-old Nikon D1X.
I can not express enough how important it is to look at actual prints and not get stuck zooming in on the computer and thinking your “camera” sucks. Once I saw the prints I knew I did it, I knew what I captured were winning shots and I knew I succeeded at passing this latest challenge.
I decided to see how a 24×36 metal print would look from AdoramaPIX. When I opened the box and flipped the print over, the first thing I saw was vibrant color and I said “WOW.” After taking a closer look at this HUGE print, all I could think was a 15-yr-old camera did this, yet no one would know if they looked at the print. No one could stand five feet away and tell me this wasn’t shot with the latest and greatest.
That’s the point guys, it’s not always about the camera or the megapixels, it’s about the person using it. I am proud to say I think I crushed this challenge and I look forward to the next one.
Download Nikon D1X RAW Files: Click Here
Access all the FULL-RES exported JPEGS Right Here