5.5 Tips To Get Better Tennis Photos
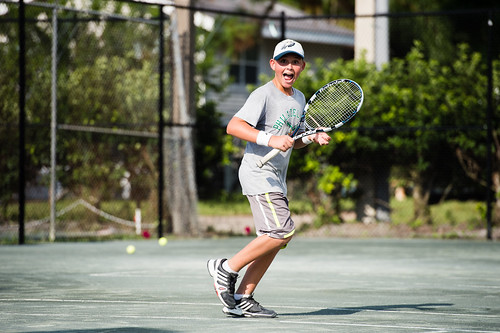
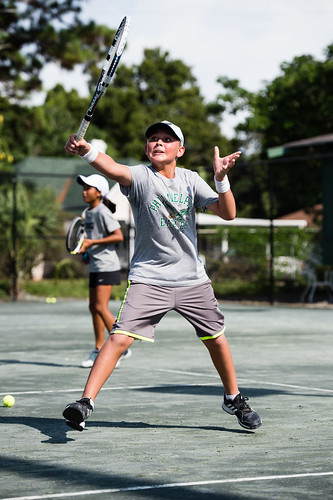
While in Florida for a family event my cousin was taking part in a tennis clinic that I decided to photograph. I have always loved tennis, I played when I was younger and have shot a few professional events in the past.
Click Here to access the FULL RES exports on Flickr.
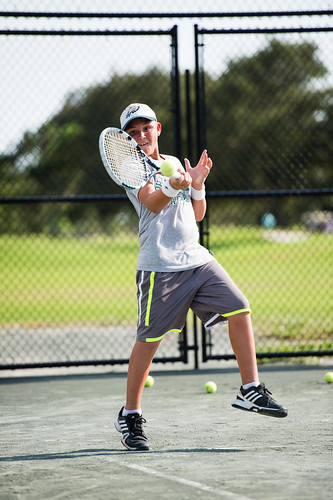 There are some rules of thumb that I want to pass along for those who want to get out there and photograph some matches.
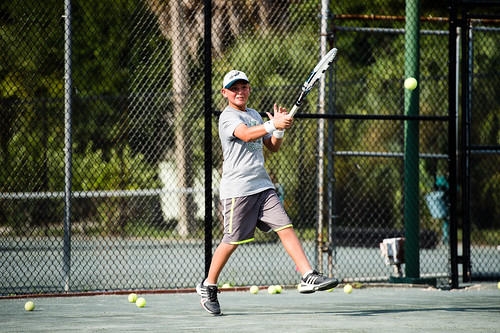
First and foremost you will hear a lot about making sure you get the ball in the frame. Now this is not always possible or written in stone. But it does tend to add interest to the image. Trying to capture the perfect moment of the racquet about to strike the ball doesn’t mean motor driving. You want to anticipate the action because the motor drive may not always capture what you are looking for.
Second look for what direction the sun is. Is the sun straight up in the air? Is it early morning or late afternoon. The reason this is important is if the player has is on their forehand and you are shooting into the sun you may not get the proper light in their face. They will be backlit which if you are not in manual could lead to the camera exposing for the background.
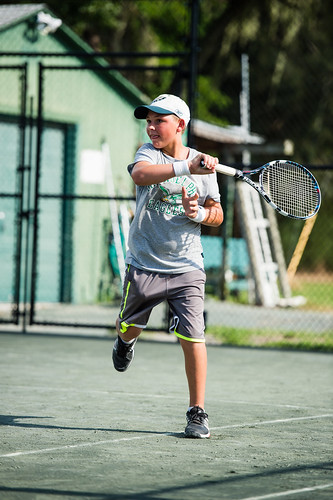
It is a good idea to have the sun at your back and into the players face. Of course the players will be moving around the court but sometimes it’s best to hold off until they switch sides to capture more images.
Third Emotions!!! Many times after a solid shot the player will let out a scream or give a fist pump. Other times after a bad shot there could be a not so happy reaction. These reaction shots can sometimes be some of the strongest ones you capture.
Fourth Fill the Frame. Yes I am on to the fill the frame and don’t crop message once again. Like I have said time and time again it is personal preference but do your best to fill the frame in the camera so you are not cropping after the fact.
Good lens choices for tennis would be a lens in the 70-200 range or a fixed 300 or 400 depending on the type of action you are looking to capture. With that said since you will be shooting outside you can break out the kit 55-200’s or 70-300 lenses and get acceptableresults. Remember with these type of lenses that shooting out at the furthest zoom will help compress the background more.
Five: Matches tend to be long so don’t be afraid to experiment with the shots you are capturing. For part of a game try to capture the serve. For otherstry and focus on capturing the ball right before or after it strikes the racquet. Shoot some wide, tight and ultra tight. Finally don’t be afraid to shoot horizonticles and verticals as you never know which will turn out to be the winning shot.
Five Point Five: Shoot RAW. I don’t buy into the school of thought that because you are shooting sports you shooting shouldn’t RAW. The mentality that you will be shooting so many images and RAW would take up to much space and take to much time to edit is bs.
Don’t overshoot and you have nothing to worry about. That RAW file will be well worth having in the long run so don’t wimp out.
How should you set the camera?
I look generally want to have a very fast shutter speed for freezing the action. That means I am in the range of 1/2000th and up. Some of your cameras will top out at 1/4000th and others will be 1/8000th. Having such a fast shutter speed will help freeze the ball, the player and the racquet. Keep in mind that it is okay to experiment with your settings to try and pan with a player at a slower shutter speed or track the action.
For these sample shots I was around F4. I could have shot at 2.8 to help compress the background more or 3.2 or 3.5 would have given me similar results. Thinking back maybe I should have shot some at 2.8 to see what the difference would have been but I did not.
Part of my thinking for shooting at F4 was to make sure that I gave myself some extra room with my focus. I am not saying I was thinking I would miss focus but more that it would be a good idea to get more of the face and body locked in.
Since I was shooting at a higher shutter speed and closed down to F4 that meant my ISO was going to be bumped slightly. I know people always say to keep your ISO down as much as possible when you are shooting outside but when you need that faster shutter speed your trade off is bumping the ISO. With that said every DSLR for the past 10 years would be able to handle 400 ISO in bright daylight without an issue.
There is nothing to be afraid of when it comes to slightly bumping the ISO. I look at it as you can not freeze the motion and keep your ISO down which theoretically means less noise or grain (which I still don’t generally see with even the D610’s) or you could get exactly what you want and not worry about it.
How Did I Focus: I used continuous focus in the Group Area Af Mode that my Nikon D4s allows. If I did not have this group area I would shoot continuos with focus tracking and move the focus point to the players face or upper body.
There are a few places that you can sit on the court or around the court that can lead to great images. Many times you will be along the side of the court which makes for some great action shots of the players moving and striking the ball.
If you have the ability to shoot behind the baseline and have a super telephoto lens you can shoot directly into the player on the other side of the court. These shots can be great for getting the ball in the frame, capturing emotion and getting a winning frame.
Finally don’t be afraid to go above court level. Some places have stands or elevated platforms that allow to shoot down on a player serving or capture some action you might not have seen at court level.
All and all I am happy with the shots I captured. I would have liked to have captured more images with the ball in the frame. I was not shooting a match so there weren’t as many opportunities to capture points. During match play you have a good 45 min to a few hours depending on the tournaments to capture images.


