

This Is How To Get The Proper Exposure In Any Situation
The other night I went out to test out the D4s again in the real world. This time, I went and shot a men’s league ice hockey game.
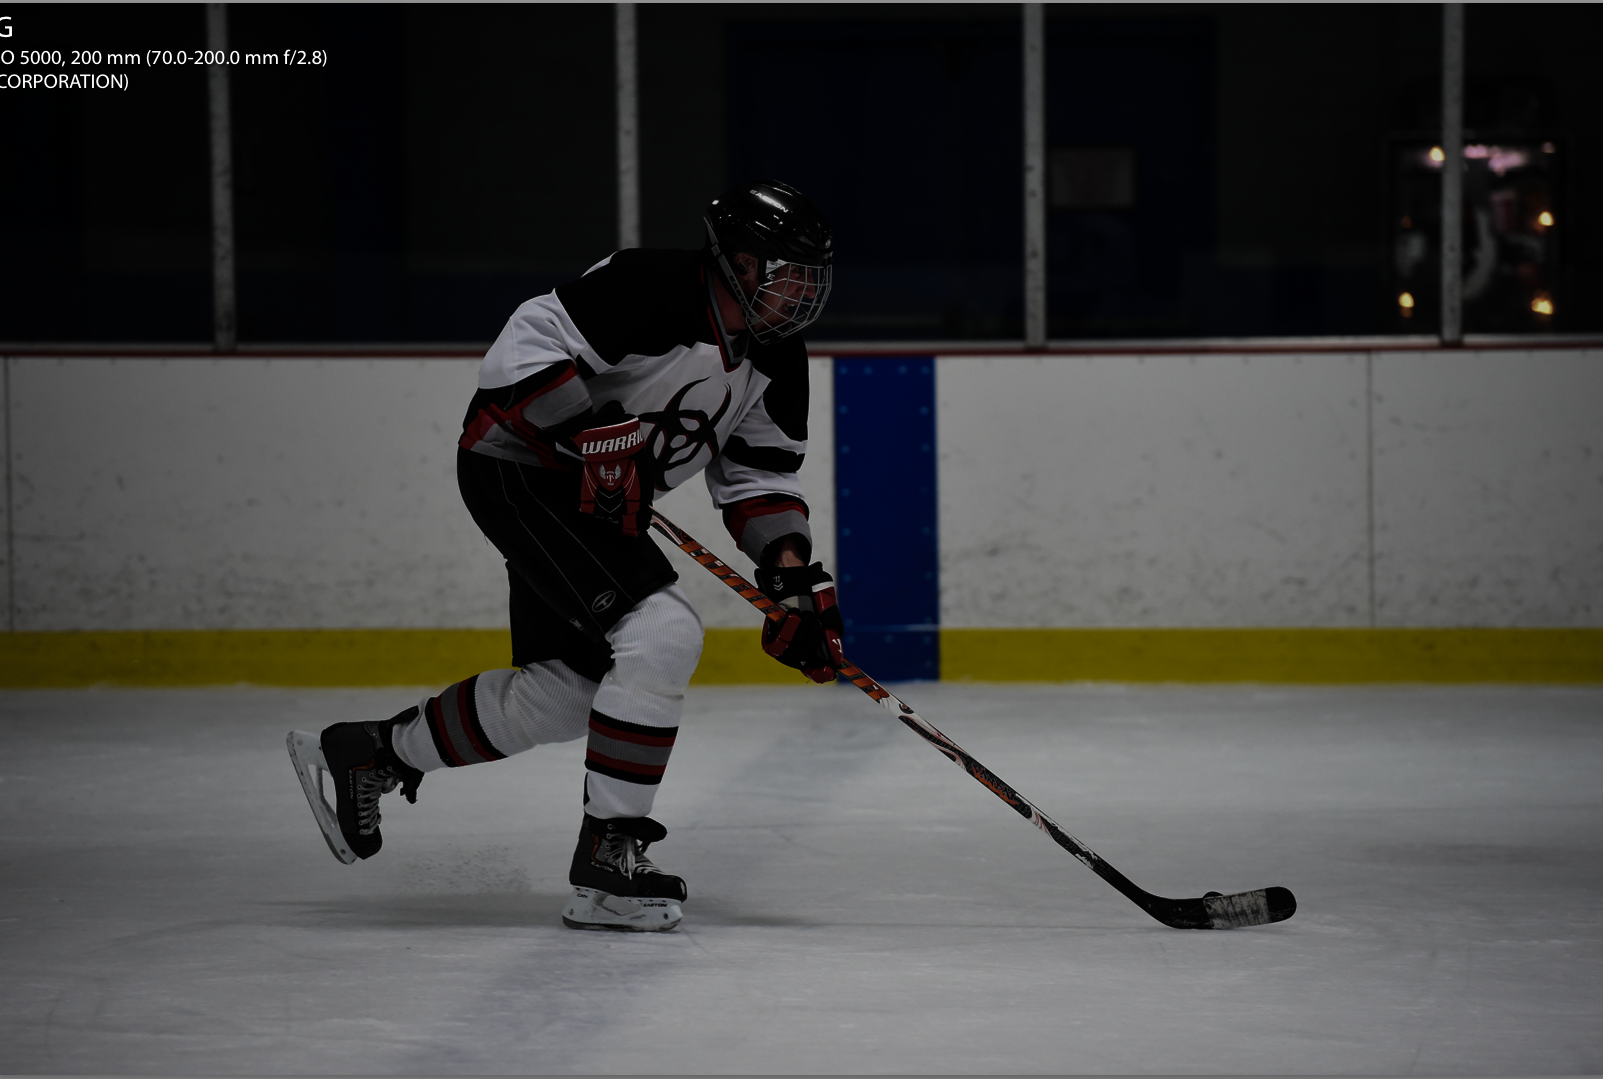
I brought with me the Nikon 300 2.8 AFS as well as the 70-200 2.8 VR II. The image below was shot with the Nikon D4s and the 70-200 2.8 VR II at 200mm handheld with VR Off.
The settings were 1/800th of a second at F3.5, ISO 5000. I used continuous focus set to the new Group Area AF. The image is not cropped and was shot in RAW+JPEG. The edited file is from the JPEG since as of publishing this post Adobe Lightroom does not support the D4s’s RAW Files.

This is what I would call an almost perfect ice hockey image. The players head is up, the puck is on the stick and the lines are right on. You can see from the background that the horizon is straight and there is no dutch angle in site.
As you know I am not a big fan of dutch angles or horizons where the lines are not straight. Cameras today give you a virtual horizon which you can activate to help you get your lines straight. However, I personally do not use that when shooting sports. I don’t know what it is but my lines generally tend to be pretty spot on.
There are a few recommendations I can give you for keeping your horizon straight: Make sure your bag is not hanging off of one shoulder which could cause one of your arms to droop. Tuck your elbows in for stability, doing so will also allow you to keep your lines straight. Other than that it’s hard to say too much as it seems to be one of those things I have always gotten right.
When it comes to shooting ice hockey, having the puck in the frame is very important. In this case the puck is on it’s edge on the other side of the stick. Having the puck in the image subconsciously tells you that this person is in on the action and not just skating around.
Let me break down my settings for you one at a time starting with the lens choice first. I started off shooting the game with the 300 2.8 and switched over to the 70-200 2.8 VR II. The reason I switched over was to allow myself to track subjects better for a longer period of time. The longer fixed lens only gives me the ability to follow a subject for so long before I lose them from the frame or start cutting off limbs.
Cutting off limbs or important parts of the players is a no-no to me. If I were to cut off the blade of the stick and the ankles then the image would be worthless. Keeping all the important parts of a person in the frame is paramount.
There is always that discussion of how do you figure out which part of the exposure triangle to start with first. Below, I will breakdown the order at which I did things and why.
In this situation, it’s a toss up of setting the Shutter Speed or Aperture first.
But let’s start with the Shutter Speed. What is going through my brain when I am first deciding on a shutter speed is what am I shooting. In this situation I am shooting ice hockey which I know is fast moving. I know that as a general rule of thumb 1/250th or a second will do pretty well with motion. But from experience ice hockey is much quicker than a lot of other sports. That is why I started with a faster shutter speed around 1/800th of a second. This is just a starting point and as we make decisions about the other settings you will be able to fine-tune your shutter speed.
Next, why did I choose to shoot this at F3.5? The reason I shot this at F3.5 was to give me a little more leeway when it came to focus. When shooting at F2.8 we know that we have a very shallow depth of field. Just because you have a F2.8 lens doesn’t mean you need to always shoot it at F2.8. Stopping down in this situation allowed for a better opportunity of getting my subject tack sharp.
I have set these first two settings without ever taking a picture. I based my first settings from experience and already knowing the reasons why I wanted my Shutter Speed and Aperture to be where they were.
Now on to the ISO. Ice rinks tend to be pretty dark so in this situation I started at 6400 ISO. Like I have said many times before many of today’s cameras: even the most beginner of entry level cameras can yield fantastic results at higher ISO’s. Just don’t forget that quality glass allows you to drop the ISO which in turn helps you with image quality.
You may be saying “I thought you shot this image at 5000 ISO,” which I did. But my starting point in figuring out the proper exposure was to guess the ISO at 6400. After taking a sample image, I saw that the image was slightly blown out, meaning that I was losing detail in the ice and my subject.
You have a few options now: you can tweak to get your exposure much closer or spot on. If the image is too bright, I can simply raise the shutter speed which will cut down on the amount of light let in. I could close the aperture down from F3.5 to F4 or more which also cuts down on the amount of light let in. Or I could drop the ISO which makes your image sensor less sensitive to light.
In this case I dropped the ISO because I liked having the faster shutter speed for freezing motion. I also liked that I was shooting at a pretty shallow depth of field of F3.5. If I was to go to F4 or higher, the background would become less and less blown out or less “bokehie.”
You have to also realize when you are photographing in a situation where the lighting is going to be even and not changing that once you get your settings correct, they generally won’t change. Keep in mind that in this situation, sometimes the hockey rink has places where less light is actually present.
Some of you out there may be asking what metering mode were you using. The truth is I don’t even know because I never looked at it. It most likely was set to matrix metering which is generally where I leave it set. When it comes to ice hockey, your meter is going to be very misleading. The meter will read the scene as being very very bright which automatically is going to tell the camera that you need a much faster shutter speed than you really need. What will happen is if you let the camera do the work, the image is gong to come out much darker than it should be.
This is the main reason why I was not even paying attention to what metering mode I was in. I know based on my experience shooting ice hockey and the fact that I can preview test shots on the screen that I will be better at manually setting my exposure.
Now that your exposure is locked in, you can now figure out what focus mode you will be in. Since this is action, I set my camera to continuous focus. I also set the D4s to it’s new mode called “Group Area AF” which will do a better job with tracking my subject. You will not want to be in single focus because you most likely will not be able to focus quick enough to get a tack sharp image.
At this point, you should now be ready to shoot some photos. Your settings are locked in, the light is not changing and you are ready to go. Now you just have to make sure you don’t get hit with a puck while shooting which brings up one last point:
Do not try and shoot through the glass. Do not try and shoot from the stand. Try to get on the bench or in the penalty box where you are low to the ice and close to the action. This is where you will get the best action shots.