
How to get Professional Photos with a Kit Lens: "Nikon D5500" 5 Min Portrait
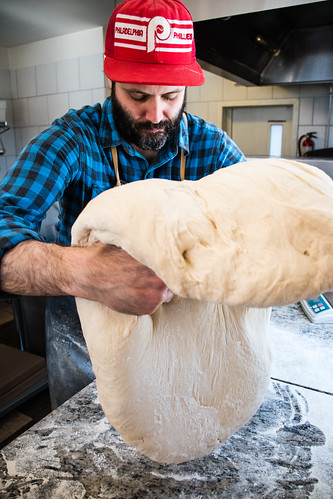
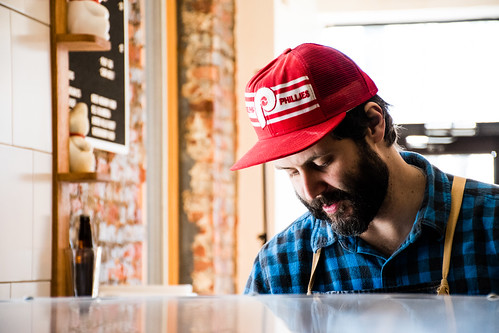
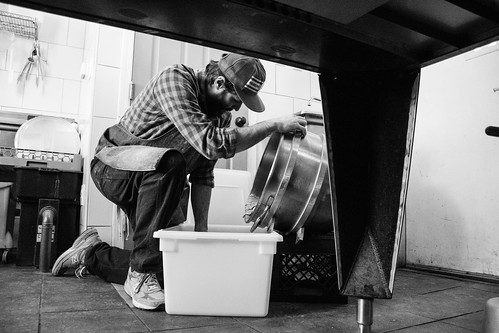
The Challenge – Use the Nikon D5500 and Kit 18-140 lens for a “Real World Review” and “5 Min Portrait”. The catch, I have never used this camera or lens before. The subject was Joe Beddia of “Pizzeria Beddia” who let me photograph his dough preparation for the evenings pizza.
Being that I had never used this camera before I had to get in the mindset that I can only use the Nikon D5500 and the 18-140 F3.5 to F5.6 kit lens. There is a misconception that you can only get great results with better glass. There is also a misconception that I can only get good photos with the most expensive gear in the world. I know once you watch this video and see the results that will never be a question or concern again.
I have uploaded every single image I captured during this photo shoot (Click Here for the gallery of images). That means you get to see the good the bad the ugly, everything. I fully processed and edited each image because I want people to see the best possible image even if it’s not the best show.
Keep in mind when I deliver images to a client I am only giving them the best of the best. I would never deliver images that I did not deem keepers.
Here’s the thing about kit lenses and why I have been so vocal about not using them, they are variable aperture. This means as you zoom out from 18 to 140 the f stop is going to automatically close down and cut back on the amount of light being let in. So unless you have a handle on the exposure triangle and know how to compensate for these changes on the fly you may end up with less than ideal results.
So the challenge to use this lens was for me to understand what will happen as I zoom out. I know as I zoom out the f stop will close down meaning I am losing light. Because I am losing light I need to do something to compensate for that. The options we have to work with in the exposure triangle are the shutter speed and ISO. I can slow my shutter down to compensate for the loss of light or I could bump my ISO higher to do the same thing. This is where many people see issues with their photos. They crank the ISO as high as they can and wonder why do their images look so grainy and terrible.
This is the mindset I got into during this shoot. I am going to start with an ISO that I think the camera can handle that gives me a fast enough shutter speed to compensate for when I zoom out. This means a starting shutter speed of 1/1000th of a second or more. With entry level cameras like the D5500 you only have one dial to control the shutter speed and F-stop. In order to change the F-stop you have to press another button while turning the back dial which takes time and will result in missed shots.
 To see all of the FULL RES images from this shoot Click Here.
This is how it works, I start at 1/1000th of a second. As I zoom out my f-stop goes from 3.5 to 5.6 which again means I am losing light. The easiest way for me to compensate for the loss of light will be to change my shutter speed, but the question is which way and how much. Simple, because I lost roughly a stop and a half of light from 3.5 to 5.6 I need to let more light in which means slow my shutter speed down. Knowing that it’s roughly two stops of light loss I can go from 1/1000th of a second to 1/250th and still get the same exact exposure as I had at 3.5.
Here’s exactly how I figure out how much to slow down my shutter. I am at 1/1000th of a second, one stop slower means you cut that number in half to 1/500th. But I need to go two stops so now I half the 1/500th and get 1/250th of a second which is two stops slower than 1/1000th of a second. This is an easy formula to figure out if you take everything one step at a time.
You need to be careful with letting your shutter speed drop to low as you may introduce shake. But 1/250th is plenty fast to freeze basic motion and in combination with the VR of the lens you will be fine.
 To see all of the FULL RES images from this shoot Click Here.
This is where understanding the exposure triangle really comes into play. If you know the cause and effect of what happens when you make changes to your ISO, Shutter Speed and Aperture you can pretty much shoot with any camera and lens combination.
If you want to learn the exact method I use to get out of auto and take control of your camera and get fantastic photos, check out the FroKnowsPhoto Guide To Getting Out Of Auto.
Once my brain started to compute what I need to do to compensate for the changing aperture, I was able to focus on just shooting. I still needed to pay attention to the lighting and angles but I now had one less thing to worry about.
My goal with every photo shoot is to make sure I cover as many angles as possible. I like to capture the wides, closeups, details and environmental shots. Though this is not the full review of the camera and kit lens I must say the zoom range of 18-140 was extremely versatile. For someone just starting out I could see recommending this kit lens over all other kit lenses. Please don’t get me wrong here, I still stand behind my recommendation to have faster glass over kit lenses. Again it mostly comes down to understanding the exposure triangle and how to capture the proper exposure no matter what gear you are using.
One of the functions that I had never used before in a camera was WIFI. The Nikon D5500 adds the option to control the camera from your smartphone. This took no time to set up and opened up a new world of possibilities for capturing unique angles.
 To see all of the FULL RES images from this shoot Click Here.
Knowing this was an option I brought a monopod with me to open up some new angles. When I saw where Joe was cutting up the dough I knew this was my chance to get the camera up in the air and utilize the WIFI to hopefully get great results.
The challenge here is making sure my angles were still straight. I had to get in the mindset that I had to move, tilt, rotate the monopod not my hand holding the phone with the preview.
Now I made one mistake in the video when I said it didn’t save the RAW file, only the JPEG. I found out after the shoot it actually did save the RAW file but it will only transfer the JPEG to the phone because of size.
Some of my favorite images from the shoot came from using the WIFI above Joe while he was working the dough. It gave me a different angle that I otherwise would not have been able to capture. Even with my D4s this would have been much harder.
 To see all of the FULL RES images from this shoot Click Here.
To bring this article to a conclusion lets take it back to the title “How to get Professional Photos with a Kit Lens”. If you are using a kit lens I gave you the formula and mindset to help you get professional results with basic lenses.
I have to say this was a challenge but it was great to use the D5500 and the 18-140 kit lens. This video shows you once again that it doesn’t matter what you are shooting with, a solid image is a solid image.
To be honest if I were to show someone just the best of the best pictures and not tell them how they were shot they wouldn’t be able to tell it was shot with a kit lens or D5500
.Purchase the Nikon D5500 from Amazon or Allen’s Camera.