


Sony RX100 IV Real World Review
In the past I have primarily focused on doing reviews of just DSLR style cameras. But today there is a whole world of cameras that deserve the “Real World Review” attention. From Mirrorless to Micro 4/3rds to smart phones and even smaller point and shoot pocket cameras.
Click Here to download 8 RAW Files from the Sony RX100 IV
Click Here to access all the FULL RES Exported JPEGS from this Real World Review.
If you would like to order a Sony RX100 IV

That’s why when Sony asked me if I would like to take the RX100 IV out for a spin I decided to say yes. Sony has been pushing the technology envelope in camera development over the past five years to some pretty astonishing results. In fact Sony makes the image sensors in most of the Nikon cameras that I have used over the years.
When I decided to say yes to review this camera I wanted to make sure I gave it a fair shake. The best way to review anything, in my opinion, is to do a “Real World Review”. That’s why I chose to take this camera up to NYC for the day and really put it to the test.
So what is my goal when it comes to reviewing a camera in the Real World? My goal is to see if I am capable of getting fantastic results whether it’s stills, video or some other function that the camera offers. Every time I set out to shoot no matter what camera is in my hands I want to get “keep” images. I prefer focusing this review more on actually real world experiences and results than simply listing all the specs. But if you would like to see a full list of specs and features head on over to Sony’s site right here.
Menu System and Camera Setup The day started off with a short ride over to 30th Street Station in Philadelphia where we would wait for our train. While I waited for the train I used that time to get a little more familiar with the extensive menu system this camera offers. One of the complaints I have heard in the past about Sony cameras is that their menu system has way to many options that it can become overwhelming. The truth of the matter is I rather have more options than less.
One great function of this camera and many cameras on the market today is that they have built in user manuals at a push of the button that explains what each function means. In the RX 100 IV you simply press the C button on the bottom right hand side of the back of the camera to see what something is in the menu.
To go along with the menu systems Sony gives you the ability to map out the almost every button on the back of the camera. This means you can have the center button for example access the ISO or select from a list of other functions. Having the ability to set up the buttons for the functions that you will use the most will make this camera feel more like a pro DSLR than a pocket camera.
In the real world this custom mapping came in handy for me. I was able to map the buttons in such a way that I did not have to remove my face from the viewfinder in order to change my ISO, Shutter Speed or Aperture, thus allowing me to capture moments I might otherwise have missed if I was searching out functions.
I can see how having so many different options can somehow become confusing or make it hard to find what you’re looking for but I had no trouble whatsoever. Using the FN button brings up a handful of quick options that are customizable to your liking. I had it set to let me quickly change focus points, turn on the ND Filter, change my FPS, Focus modes and much more.
Camera Feel
This first thing you will notice about this camera is not how small and compact it is, it’s how it feels in the hands. The camera has some weight to it, it feels substantial which isn’t always normal for point and shoots. I have pretty normal sized hands and the camera seemed to fit well for my shooting style.
Memory Cards
Before we get to our first shoot I wanted to talk about what memory cards you can use with this camera. Being that this camera has the ability to shoot 4K video internally as well as take photos at 16 FPS you need to have right SD card, this camera moves a TON of data.
You will need to use a SDXC card that is at least UHS-i or ii Class U3 to take full advantage of all the features this camera offers. You can use SDXC class 10 or SDXC UHS-i or ii U1 but some features will not be accessible. The moral of the story is make sure you have the right card as well as backups. For this review I used the LEXAR SDXC II U3 128 gig card.
The LENS
The Sony RX100 IV has a Zeiss Vario-Sonnar 24-70mm (35mm equivalent) F1.8 to 2.8 zoom lens. My main carry around lens on my pro body tends to be the 24-70 2.8 because it is a fantastic range. It gives you the ability to get a nice wide shot as well as tighter portraits when needed. It is a very nice range to have
What makes the lens so good is that it’s a F1.8 to 2.8 variably aperture lens. This means you can shoot wide open at F1.8 to isolate your subject from the background. It also means as you zoom out to 70mm you are still shooting at F2.8, that’s a huge deal. Having super fast glass like this in a point and shoot will allow you to get much cleaner images.
I am sure some people are saying they wish the zoom range was much larger. I too would love to have a longer zoom but you have to understand the tradeoffs that happen when you add a large zoom. First the camera has to be bigger all the way around to manage the extra zoom range which would add size and weight.
Second as the zoom range goes up so does your aperture. This means at longer focal lengths you are losing more light which in turn directly effects image quality. At the end of the day, if you want to have more reach you could always use the C word and “crop” since you have plenty of megapixels and high quality optics. I always say Glass, Glass, Glass, Glass, Glass and this camera has the “Glass” to back it up.
Electronic Viewfinder (OLPF)
Ah yes, the downfall of pretty much every compact point and shoot on the market is the lack of viewfinder. At first glance you would think the RX100 IV doesn’t have one either but with a push of a button BAM an EVF (Electronic Viewfinder) pops up. I cannot tell you how awesome it is to have an EVF that pops up when you need it. I am a big proponent of using the viewfinder over the LCD. For starters you get better stability when you’re holding the camera which leads to sharper photos. More importantly you get to see the result of the images before you ever press the shutter button.
For example if you’re shooting in manual mode you can see all the changes to your exposure in real time. You can see the clouds show up in the sky as you change the shutter speed or you can watch the depth of field change as you tweak your aperture. The electronic viewfinder is one of my favorite features not just in this camera but in all Sony cameras on the market. I can honestly say I wish I had something like this in my $6,000 DSLR.
My only criticism of the viewfinder is every time you pop it open you have to also pull out the viewfinder in order to see the image. When you close it you have to press that in prior to pressing the EVF down into the camera. Again, this is not a deal breaker but it’s something I hope they address in future models.
180 degree tiltable 3 inch LCD Screen
A lot of your time with this camera will be spent looking at the 3 inch screen. This is the best thing to use when it comes to setting up the menu system, reviewing images, making videos, shooting panos and more.
The screen is bright, crisp and easy to see at all angles. You can even tilt it 180 degrees to put it into selfie mode for both stills and video. I loved this option for filming myself Vlogger style while on the streets.
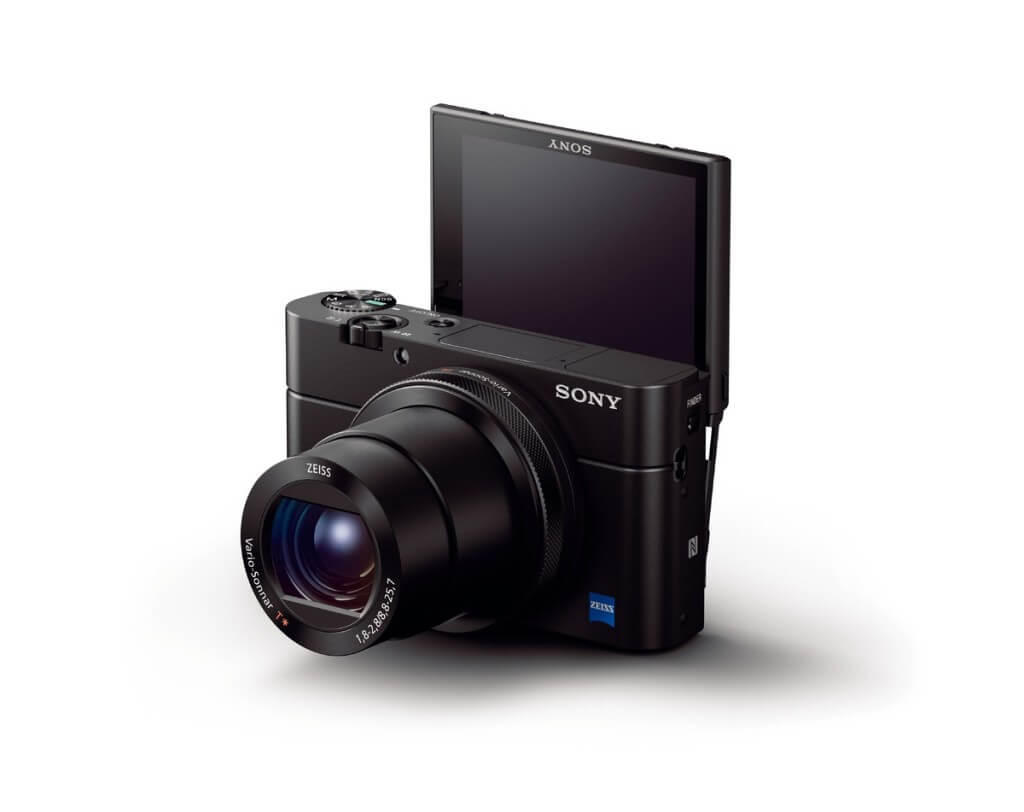
Having the ability to tilt 180 degrees allows you to place the camera on the ground and get a super low angle without having to lay facedown to get the image. You can simply tilt the screen flat so you can look down at the image you are about to capture.
The only thing I wish the viewfinder had that it does not was a touch screen. I found myself intuitively wanting to touch the screen to make changes to my settings or quickly move the focus points to where I wanted them. I am sure part of the reason it does not have a touch screen is price consideration. In future models I hope there are able to include a touch screen.
EVF to LCD
I thought it was important to point out what happens when you go from using the LCD to using the EVF. The camera is smart enough to detect when your eye comes close to the viewfinder thus switching off the LCD and turning on the EVF for use. This option is great especially in low light situations where a bright screen could make it more difficult to see the EVF.
4K Internal Video Recording
Being able to capture 4K video internally directly to a memory card is a testament to the stacked image sensor the RX100 IV has on board. We all know that 4K is something many people want but most don’t know why. They also don’t understand when capturing 4K your file sizes will be 4x the size of your 1080 video.
The sheer fact that this camera packs so many pro level video features is pretty cool. One of those features is the ability to record in XAVC S format which provides for low compression and low noise video capture. You also have zebra stripes, focus peaking, manual focus and picture profiles.
With 4K recording you have the ability to record up to 5 minutes at a time. Some people may say that’s not enough but you have to keep in mind this is a point and shoot camera and is not meant to be your main video shooting camera. With that said we were able to run a test where we recorded for five minutes and as soon as the recording stopped we reset it and repeated five times without any overheating issues.
How does the video auto focus work? I noticed that the auto focus took a second to acquire the focus on occasions but once it found it it generally kept it. Overall with the video I was shooting I didn’t see many issues in regards to getting tack sharp focus.
Audio Recording for Video
How does the audio sound from the built in microphone? Surprising the audio sounded very good when I was shooting my Vlogger style videos. But there is one thing you will notice this camera does not have, audio inputs. I like having the ability to add external microphones to capture much cleaner audio at further distances.
Again, this is not a full fledge professional video camera, it’s a compact point and shoot that already packs some major features. I am sure the desire to keep this camera compact lead to it not having space to including a mic jack. Beyond that the camera doesn’t have a hot shoe for you to attach a transmitter anyway. NOT A DEAL BREAKER.
Something you will need to keep in mind is the more video you shoot the quicker your batteries will drain. This is why I recommend making sure you have enough batteries to cover your shooting needs. This is a perfect lead in to how you charge the batteries.
Charging the Battery
You will notice when you open the box you will not find an actual battery charge in the box. The box includes the cable which allows you to use any USB port to charge the battery inside the camera. This is nice for when you want to travel light and not take a wall charger or simply use an external USB battery charger to top off your camera.
I personally purchased a universal SONY battery charger to allow me to quickly charge up the extra batteries I purchased without having to connect the camera to a power source. This option gives you the ability to charge one battery in the camera while charging one in this charging dock. It’s a pretty inexpensive option for charging your batteries.
Click Here to download 8 RAW Files from the Sony RX100 IV
Click Here to access all the FULL RES Exported JPEGS from this Real World Review.
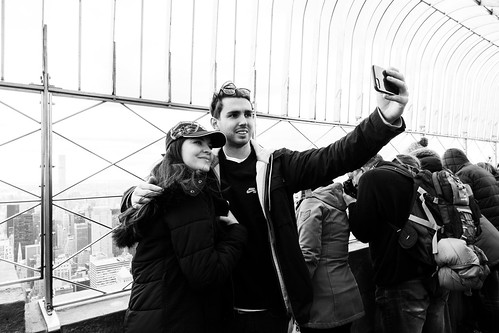
Photoshoot #1: Empire State Building
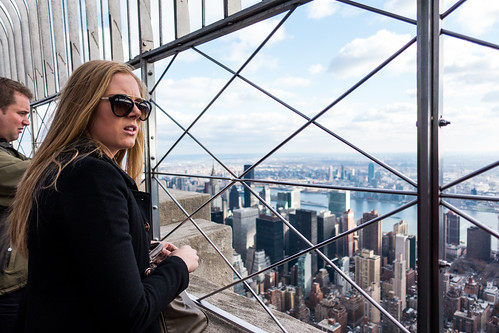
If you ever head to NYC one of the most touristy things you could ever do is go to the top of the Empire State Building, that’s what we did. The reason we chose to go there is you wont find a more real world situation to test out a camera than up on the 86th floor.
While we waited in line for the second elevator to the 86th floor I decided to shoot some photos out the window of the clouds in the sky. This was a perfect chance to try out the 1/32000th of a second shutter speed capability.

For those who don’t know, my $6,000 pro camera body has a top shutter speed of 1/8000th of a second. The RX100 IV has the ability to shoot a photo all the way up to 1/32000th of a second which means have the ability to shoot at wider apertures even in bright situations. This is an important feature not just for when you have a lot of light but for when you want to super freeze some type of motion.
Maybe you want to freeze a water balloon popping or in a more real world situation a dog running towards you at F1.8 in a really bright situation. Once we got up to the 86th floor observation deck it was time to go to work. The key features I wanted to test out during this shoot were: Panoramic Mode, Electronic Viewfinder, Zoom Range, Wide Open shooting at F1.8, Close focusing and selfie video mode via the flip up screen.
***IMPORTANT TIP***
Be sure to use the included wrist strap at all times. The one thing I didn’t want to happen was to drop the camera off the Empire State Building. You don’t want to drop any camera so please use the wrist strap at all times.
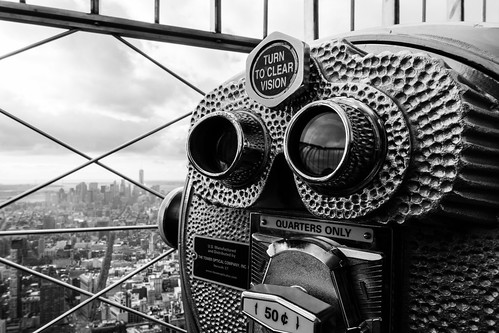
If you have ever been to a tall building you would know they have those “binocular” devices you can drop a few quarters in to help you see things at a distance. Not only are they fun to use but they look great and make for a nice test subject.
My goal with photographing those things was to show how close I can get the lens to focus as well as showing what F1.8 looks like vs F11. The results in my opinion were great. You can see how shallow the depth of field is at F1.8 and what it looks like when you have more detail at F11.
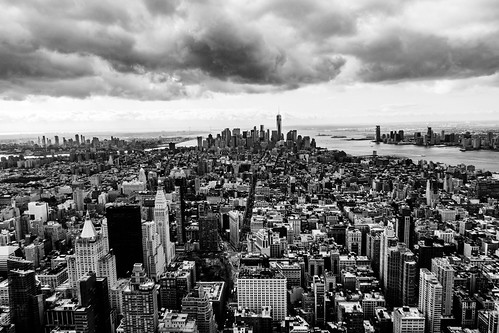
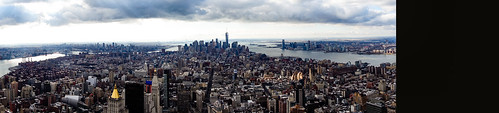
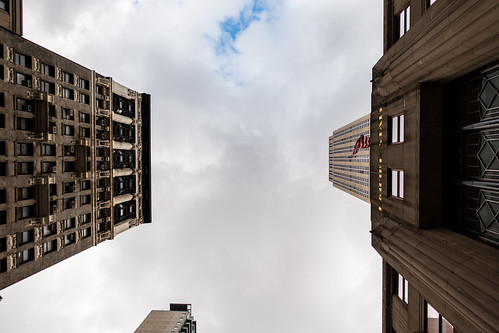
Panoramas
When you are on top of New York City you want to be able to capture as much as possible. The RX 100 IV offers a really crazy panoramic mode. All you need to do is switch the top dial to the pano mode and follow the on screen instructions. You have the ability to shoot from left to right, right to left, top to bottom and bottom to top.
Keep in mind when you switch into this mode you will only be able to shoot JPEG as it overrides the RAW functions. The reason it does this is because the camera is literarily taking rapid fire photos and sticking them together all in the camera to give you a finished image.

This mode takes a little getting used to. You have to move at the proper speed for the right amount of time to get a keeper image. The first few I attempted ended with the camera telling me I did something wrong and to try again. I was however able to figure out the proper motion and came home with some astonishingly detailed images that captured the essence of NYC.
I was able to capture river to river with many of the bridges, buildings and even Ellis Island and the Statue of Liberty in the background. I was able to edit the JPEG files without a problem to create not just a stunning color image but also an amazing Black and White image. I even printed the photo out 22 inches long and it looked fantastic.

While attempting to capture panoramic images I did run into one issue where if I didn’t move at the right speed the panoramic would end leaving a blank space in the jpeg. Honestly this is not a huge deal, you can either re-shoot it or simply crop out the tail end and still have an awesome panoramic image.
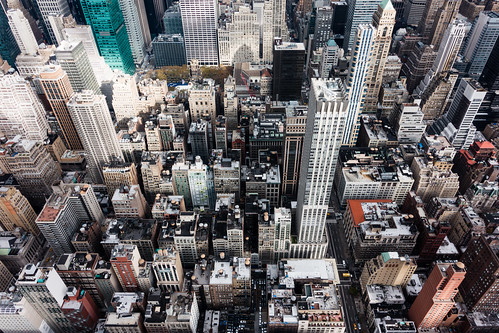
Empire State Building Conclusion How did the camera handle one of the largest tourists destinations in the world? I was really happy with the results I was capturing. I love getting into the “shooting mindset” no matter what camera I am using. Put a camera in my hands and I am going to push it to its limits in the attempt to get fantastic results. I think I came down from the 86th floor with some extremely solid images. The type of images that would surprise some people that they were taken with a pocket camera and not a more expensive pro camera. The Panoramic’s surprised the heck out of me, the fact that the camera can build all of that on its own is pretty amazing. The zoom range worked well for everything form street style photos, to wide cityscapes as well as zoomed all the way out tighter building photos.
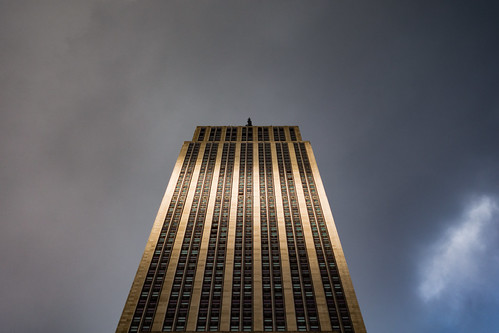
Some of my favorite photos are the ones of the outside of the Empire State Building shot from street level. The angles, the colors, the clarity all make for what I think are some stunning images.
After reviewing the images and editing the RAW files I was really ecstatic with the results. The RAW files held a ton of data that enabled me to really bring the images to life in post. If you don’t plan on shooting RAW please be sure to shoot in the highest quality JPEG. The camera does a very nice job with JPEGS
As always there are a few minor issues I ran into. One was accidentally pressing the video record button with my hand when I didn’t want to shoot video. This only happened a few times until my brain told my hand to stop doing that.
The second is battery life. I chewed through the first battery while on the 86th floor. To be fair when I am reviewing a camera I am spending more time studying the menu, shooting test images / video and reviewing the images than a person who’s going around taking random photos and videos. With that said I highly recommend owning two or three batteries in total for this camera. First it’s a good idea to always have backups just in case. Second, keep in mind, the more 4k video you shoot the quicker you will drain down the battery.
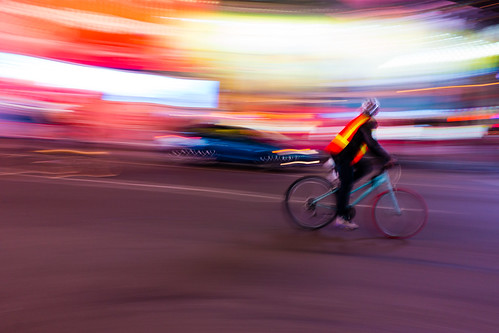
Photoshoot #2 Panning and Cop Directing Traffic
While out on the street I saw a Cop directing traffic and thought that would be a great opportunity to try and capture some motion in images. I had to put on my thinking cap for a second to figure out how I can get the panning effect I was looking for.
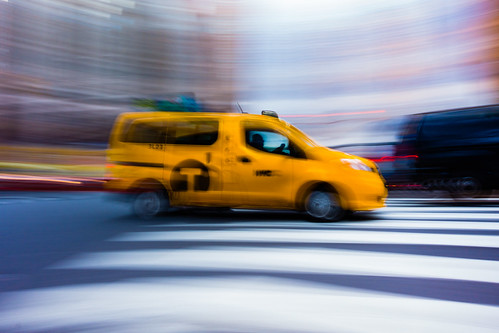
It turns out this is a really simple thing to accomplish with the RX100 IV. I simply turned the top dial to Shutter Priority meaning I set the shutter speed to what I wanted and the camera would do the rest of the work to make sure my exposure is spot on.
All I had to do was set my shutter speed super low, compose the image, press the shutter and let the camera take over from there. I had visions of showing the cop’s hands directing traffic while cars streaked by and those visions turned into successful images.
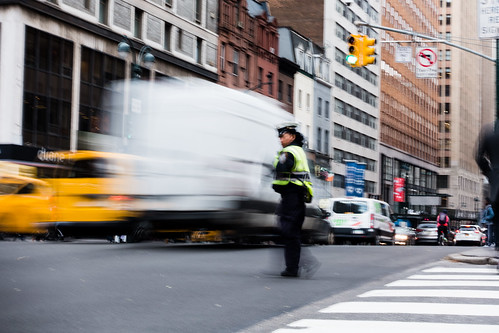
I also have to point out that part of success came due to the “Steady Shot” built into the camera which helps stabilize your image. Steady Shot in this camera really helps with sharper still images as well as video. As you can see from the sample images, I was able to capture some uniquely New York centric photos. A NYC Cop directing traffic as cars wiz by all captured to give you the sense of motion all captured in one single frame. A yellow cab streaking through an intersection as the city streaks by in the background. All of this was made as easy as pick a shutter speed and let the camera take over from there.
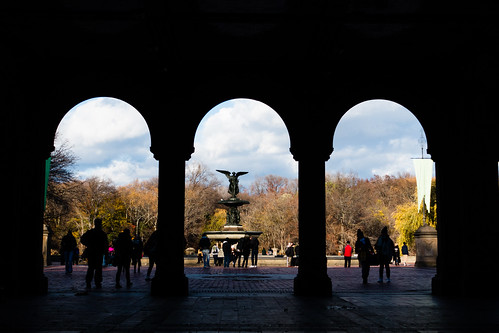
Photoshoot #3 Central Park Central Park is an oasis in the middle of a fast paced city that will blow your mind. If you’ve never been there you might want to add it to your travel list. The park is immense and offers up so many different sights, sounds, smells and photographic opportunities. It presented me with the opportunity to test out some of the more unique features of the RX100 IV.

The first stop in the park was at Bethesda Terrace and Fountain. At first we wanted to take photos of the fountain running but soon discovered it was shut off for the winter. But the underground walkway offered up a tremendous opportunity to capture some fantastic architecture and people photos.
Like I said earlier in this review, I spent most of the day with the camera in manual mode. I was super surprised to find that I was able to control all of my exposure settings as easily as I was. The reason I was able to do so was due to a few factors.
First my ability to map out the function buttons to my desire settings. What I mean by this is the RX100 IV lets you tie a specific function in with pretty much any of the buttons on the back of the camera. I was able to set the large center button to be my ISO, the large ring around the camera acted as my aperture ring and the back spin dial acted as my shutter speed controller.
On top of that I set other quick buttons to act as my focus selector, frame rate selector and many other functions. As a quick side note, the FN button is fantastic for accessing a ton of useful functions quickly.

Not only does this camera allow for a professional like me to have all the control I want but it also allows for amateurs or people who just want to simply use their camera in auto to get fantastic repeatable results.
As I pointed out earlier in this review I fell in love with the popup viewfinder (sans needing to pull out the eye piece each time it pops up). The viewfinder was extremely bright, vibrant and crisp and allowed me to see all my exposure changes before I took the photos. This made it much easier for me to capture some of the street portraits that I may not have otherwise been able to capture.
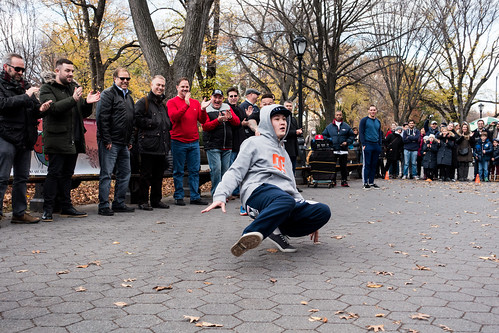
Multiple Frames Per Second
One purchasing point for many people is “how many frames a second does the camera shoot”. This camera has a mode that allows for you to shoot upwards of 16 FPS. In this mode though you need to keep in mind that the camera will lock in exposure and focus to let you capture that many. I primarily shot in the mode that allowed me to capture 5 FPS which was plenty for me.
To test out the rapid fire ability of this camera I was able to capture 40 RAW files in a row of a break dancer without a missing my focus or exposure. That right there is not something I expected but was surprised to see when I reviewed the images.
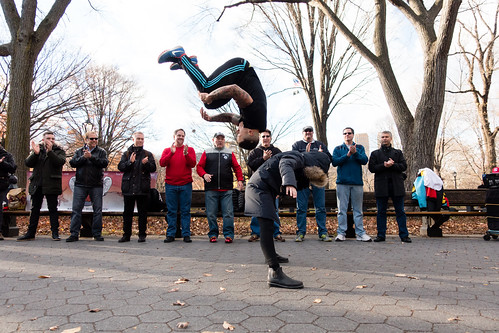
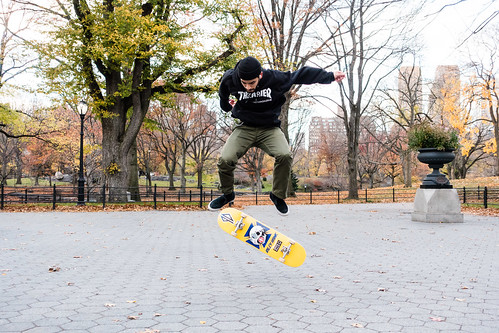
960 FPS Super Slow Motion Video Capture
Think about this for a second, the RX100 IV allows you to capture video up to 960 FPS internally!!! There are few cameras in the world that allow you to capture video like this. In the park we had the perfect opportunity to test out this function. First with street performers who were jumping over people and second with a skateboarder.
Once you switch into the HFR or High Frame Rate mode, you have a few ways of recording the 960 FPS. One is to hit the record button and capture two seconds (there is an extended 4 second mode) of a scene. Once the two seconds is recorded the camera will tell you it’s “recording” which actually means it’s processing the file internally to slow it down. I hope Sony works on the notification that pops up so it doesn’t confuse people like it confused me at first. This may take a minute or two to accomplish so you simply have to let the camera work.
The mode that I like to use is the one where you press the record button after the action you wanted to capture ended. This mode starts recording everything that’s going on and when you hit the record button it takes the two seconds prior and turns it into the super slow motion video.
What you need to keep in mind is this is an extreme function of the camera and requires that your scene has an abundance of light present to give you the cleanest video possible. You will notice when you put the file in the computer that the high frame rate video may not be the cleanest video ever but that’s the nature of capturing a scene at 960 FPS. This function is extremely cool and fun to play with but you may want to try some of the other HFR options the camera offers.
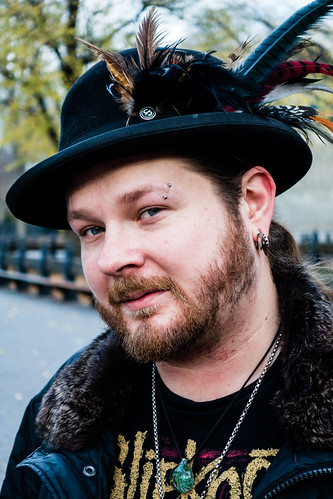
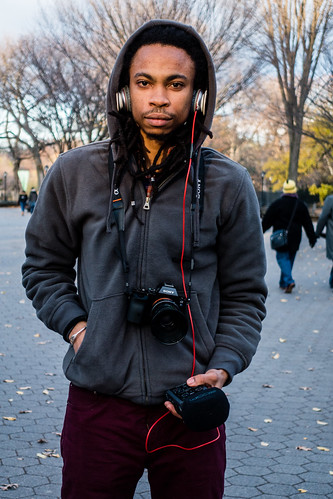
Street Portraits In The Park
In the park one of my goals was to capture street portraits and candid images. Whether it was the family sitting on the bench, a street performer, portraits of random people or a lonesome bird. The ability to have such a small and compact camera allows you to be more inconspicuous when taking street photos. The 24-70 zoom range is great for getting those nice wide scene setting establishing shots to tighter portraits when you have a subject right in front of you. When I am shooting with my high-end professional camera I always have the 24-70 range with me. I have even said in the past that if I had to choose one lens to take with me, and only one, it would be my 24-70.
With that said I still would love to have a slightly longer reach out of the RX100 IV. But I understand the reasons why it does not. First with the amount of megapixels in this camera you have the ability to crop if you choose to. I personally do not crop my photos but you may decide to if it helps your image out. Two, the trade off in having a longer lens in a compact camera would not be worth the loss of aperture.
 Pocket cameras with MEGAS ZOOMS will not have a fast aperture of 1.8 to 2.8. This means as they zoom out they start to lose light causing the camera to have to bump the ISO or slow the shutter speed down leading to issues in image quality. It looks like I digressed slightly from street portraits there but I am extremely happy with the quality of images I was able to capture in the park. The family on the bench is one of my favorite shots of the day.
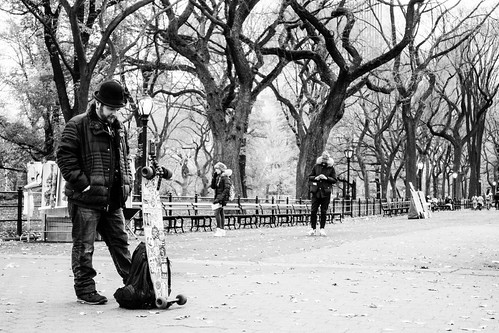
Another fun photo is the one where I placed the camera on the ground and utilized the tilting screen so I did not have to lay flat on the ground to see though the camera. Something like this allowed me to get an angle that I don’t normally see thus enabling me to capture some awesome photos.
WIFI and NFC
In a world where people want to share their photos instantly with the world the RX100 IV lets you do that with far superior quality than a phone. The built in WIFI and NFC allow you to sit in the park and easily make a connection to whatever mobile device you have. You can quickly transfer selected JPEG images or even use your phone as a remote shutter release and controller.
It was easy for me to sit in the park during a break, transfer a select file to my phone, edit it and get it out into the world. I will get far superior results from my RX100 IV than I would from my mobile phone. Having the ability to share with the world or control my camera with a built in app is fantastic.
Photoshoot #4 Cupcake Bakery
A quick break at a coffee shop / bakery lead to some of my favorite shots from NYC. You would think a break means stop taking photos, but for me when a photo presents itself I want to capture it. Yes I bought cupcakes to eat but they made for a great subject to test out the close focusing ability of the lens. I was blown away by my ability to fill the frame with the cupcake at 24mm while shooting fairly wide open and get a tack sharp image with a blown out background.

When you zoom in on one of the sugar dots on the cupcake you can see how the quality I was able to capture with the RX100 IV. Next up I asked one of the employees to “present” the cupcake on a plate to me on the counter. My goal was to focus on just the cupcake while making the employee look out of focus in the background. This is generally an easy task with a professional camera and much harder with a point and shoot but the RX100 IV handled it without a problem.

Photoshoot #5 The Subway I call this a photo shoot even though it only covered a short period of time as we headed to Time Square. One of the best photos I captured the entire day was of Adam on one of the subway trains. It was rush hour so we were packed into the train with not much room to move. 
With so little room I was glad I had such a small and inconspicuous camera to shoot with. I was able to capture an awesome portrait of Adam while the train was rocking back and forth and I had a slower shutter speed. I was able to due so because the Steady Shot counter acted whatever shaking the train was causing.
After we exited the train at our stop I quickly composed a frame, hit the red video record button and captured a train car leaving and another one pulling in in on another track in an opposite direction all in 4K. Having the ability to go from still mode to video recording with one push of the button is a nice option to have. Just be careful that you don’t accidentally hit the red record button with your hand when you are trying to capture stills.
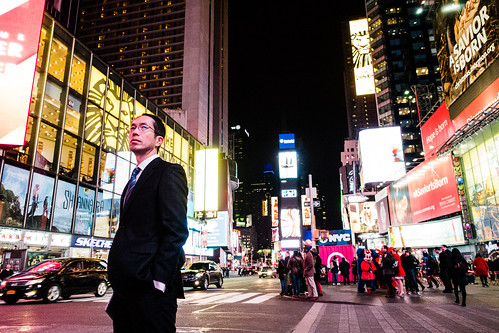
Photoshoot #6 Times Square
Times Square was our last scheduled location for testing out the RX100 IV. The goal here was to simply try and convey the feeling you get when you are standing in Times Square. There are bright lights, loud sounds, tons of people and police.
I was lucky enough to run into a few Fro readers who were kind enough to act as models in my photos. I asked them to recreate the famous dipping photo in Times Square from WWII. Of course there are a lot of differences between the two but it was a fun photo to try and capture. 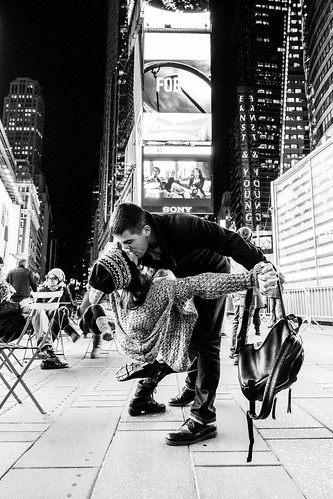
What was great about Times Square and it being our last shoot for the day was that I had the ability to just shoot aka do my thing. I like when I can focus on just shooting and not worrying about talking to the camera or testing out a feature. Being that it was the end of the day I was free to take all the things I learned about the camera from the day and put them into practice in the real world.
This led to some awesome candid photos of police officers with automatic weapons standing guard in Times Square. I finally got to push the ISO and see the resulting RAW files. The camera handles higher ISO pretty well but keep in mind with a smaller 1 inch sensor you’re going to see some noise or grain get introduced into your images. Many people see this as a major issue and something they try to correct in post with noise reduction. I personally see it as adding character to my images, within reason. I say within reason because if you push any ISO too far your going to start to see quality issues. You can download the RAW files for yourself to see how well the camera handled the higher ISO’s. 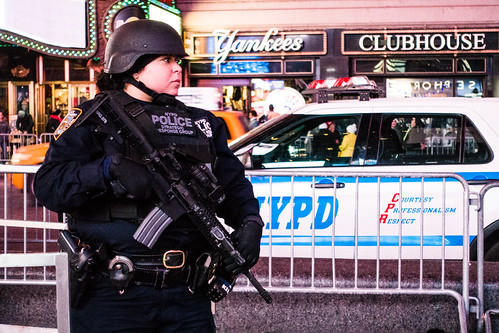
Conclusion and Who’s The Camera For
Like I said in my video, the only way to truly test out a camera is to take it into the REAL WORLD. That’s exactly what I did with the RX100 IV, I took it into the real world, pushed it to the extreme and came back with some fantastic results.
To me, all I care about is having a camera that allows me to capture the images I see in my head. It needs to give me the freedom to control the settings I want when and how I want. Does this camera allow me to do that, YES. Does it allow me to capture professional quality images, YES. Does it have a ton of functions and features that actually add value to your shooting, YES.
Here’s who I see this camera being perfect for. If you’re a professional photographer who doesn’t want to carry around your DSLR, extra lenses and accessories, but still get solid results whether you shoot in auto or manual, this camera is for you. This is a nice feature-packed pocket camera that I could see traveling with when I leave my DSLR back at the hotel.
If you’re an amateur photographer or someone who simply wants to get fantastic results from a pocket camera this RX100 IV is for you. I know not everyone needs or even wants to shoot in manual. Most people want a camera where they can switch it on and get great photos and videos. This camera will allow almost anyone to pick it up and start shooting without any problems.
Are there cons to this cameras, of course, there is no perfect camera in the world and there probably never will be. But the pros far outweigh the minor cons that I found with this camera. It falls into a place where it has enough quality features to keep a pro happy but plenty ease of use to keep a novice or beginner getting fantastic results.
In the end, if you’re in the market for a pocket camera for yourself, or as a gift, this a great option to consider.
Click Here to download 8 RAW Files from the Sony RX100 IV
Click Here to access all the FULL RES Exported JPEGS from this Real World Review.
