

RAW vs JPEG Side by Side Comparison
One of the most hotly contested debates in all of photography is “RAW vs JPEG”. Over the past week on FroKnowsPhoto.com I have taken all the JPEG shooters reasons for not shooting RAW and turned it around into reasons why you should be shooting RAW.
(There will be a full length article on RAW vs JPEG coming soon)
I have done a lot of talking on this matter but now its time to do more showing. What you will see in these two videos are actual samples of RAW + JPEG that were captured at the same time going head to head. There are overexposed and underexposed images as well as the “I got it right in the camera” JPEG vs RAW corrected comparisons.
I have uploaded the sample images to my flickr account. In the video I mentioned I would upload the jpeg files as they came out of the camera. For comparison sake the files that I made corrections to to compare against the RAW have been exported from lightroom in full-res.
Please enjoy both parts of this series Hit the break to see part 2 and sample images.
Sample JPEG vs RAW from the video with explanations. Click each image to see the FULL RES version on FLICRK.
All images shot with the NIKON D3s and Nikon 24-70 2.8. The RAW files were captured at 14 bit RAW uncompressed and the JPEG’s were captured with varying picture control settings to try and get them “right in the camera”. The camera was set to RAW+JPEG so each image is identical. The camera was set to M and I bracketed about 12 stops, from very underexposed to way overexposed and than selected the images to edit.
The first image you will see in the first 4 examples is the JPEG as it came out of the camera before corrections were made. The last 3 images are the JPEGs as they came out of the camera with only the corrections that were made in the camera.
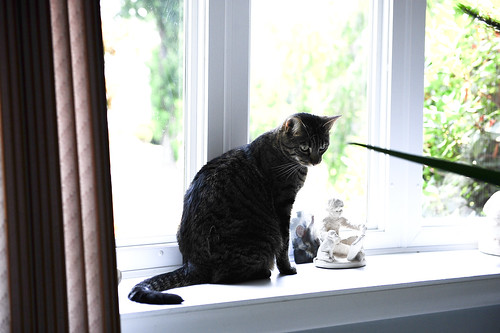
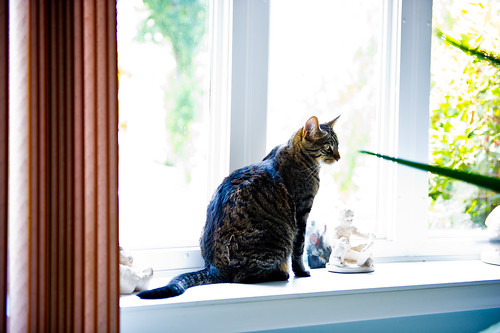
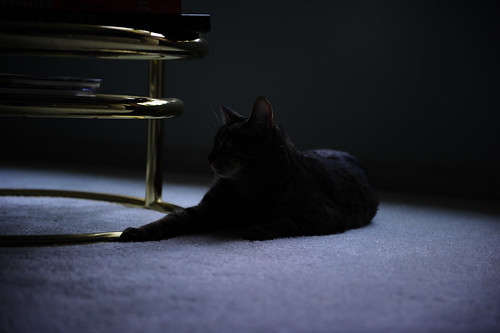
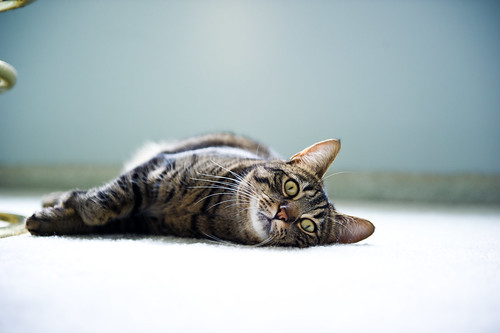
Example #1 JPEG exactly out of the camera
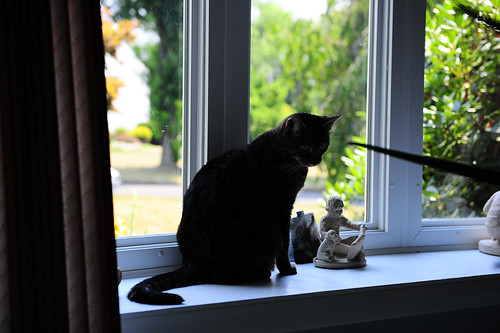
Example #1 JPEG version
This JPEG image was brought into LR3 and was extremely underexposed. The only correction that was made to this file and the next example of the RAW file is the exposure was put to +3 (all other corrections were done in the camera using picture control before the image was captured).
As you can see the cat is very flat and lacks life in way of color. Look how flat the blinds look on the left hand side and how the shadow area on the right hand side is just lacking anything.
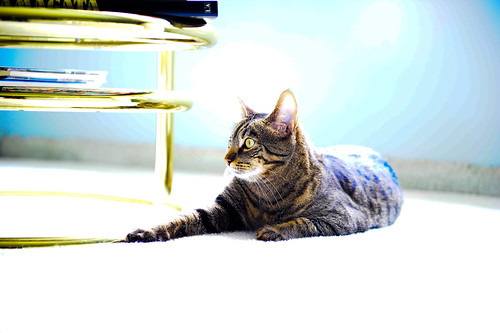
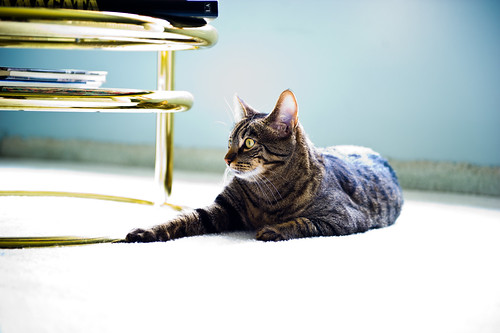
Example #1 RAW
This RAW image was brought into LR3 and was extremely underexposed. The only correction that was made to this file is the exposure was put to +3.
As you can see there is life in the cat, we only made one change to the raw file and that was the exposure. You can see how the cat comes alive and you can see color in his face and fur. Look on the left hand side at how the blinds now have some life in them and the shadow area on the right hand side now has life and more detail.
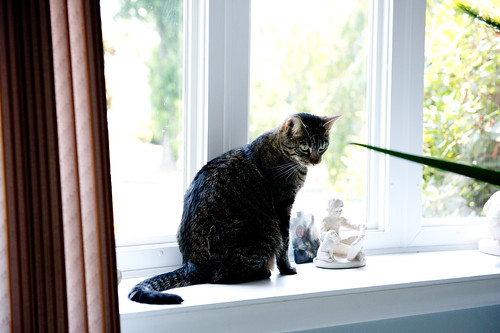
Example #1 JPEG exactly out of the camera
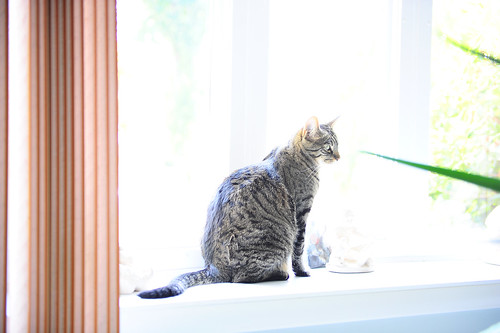
Example #2 JPEG
Sample number two is a very underexposed image that was fully corrected in lightroom to try and bring it back. In the camera the Picture Control settings were set to vibrant and the sharpening was set almost maced out.
You may think this was saved but when you compare it to the RAW example you will see the differences in detail.
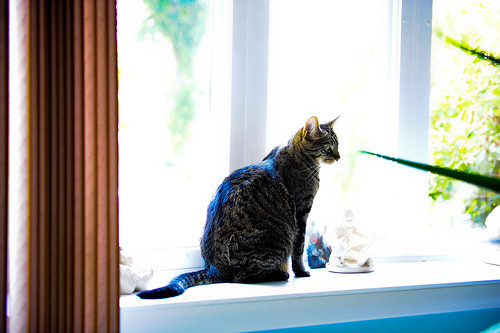
Example #2 RAW
Sample number two is a very underexposed image that was fully corrected in lightroom to try and bring it back. The RAW file was tweaked in LR3 make it a usable image
As you can see in the comparison to the JPEG there is a lot more detail in the background that is brought back as well as the cat looks more 3d and dynamic.
Example #3 JPEG exactly out of the camera
Example #3 JPEG
This image was extremely underexposed and the only correction made in LR3 was maxing out the exposure to +4.
As you can see all the dynamic range of the color is pretty much gone. The cat looks flat the table looks flat, all and all the image is flat.
Example #3 RAW
This image was extremely underexposed and the only correction made in LR3 was maxing out the exposure to +4.
In comparison to the jpeg this image has life, it has dynamic range of color. Keep in mind there was only one tweak made to the RAW file and if fully corrected this image would be fully usable.
Example #4 JEPG exactly out of the camera
Example #4 JPEG
This was a very overexposed image that i tried to fully correct in LR3 using the jpeg as captured in the camera. As you can see when I brought it back you start to get banding in the color on the wall. All of the extra data that is still in the RAW file is lost in the JPEG and your left with banding.
Example #4 RAW
This was a very overexposed image that i tried to fully correct in LR3 using the RAW file that was captured in camera. As you can see there is no banding in the wall as compared to the jpeg file. This image was fully brought back into a usable image.
Example #5 JPEG “I get it right in the camera”
I wanted to show you an image that I would say was exposed properly in the camera. This is a big thing for jpeg shooters to tell you “I get it right in the camera” which means they do no other post processing of their files.
This looks pretty good until you look at the corrected RAW file in the next example.
Example #5 RAW
This image was captured properly in the camera and tweaked in LR3 using the RAW file. In comparison to the JPEG in the previous image you can see the difference in the color and the way the image pops. The RAW image takes on more dimension in way of color and shadow detail.
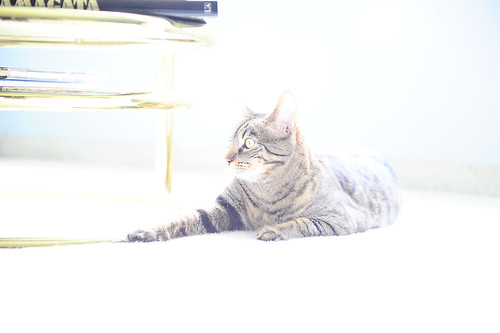
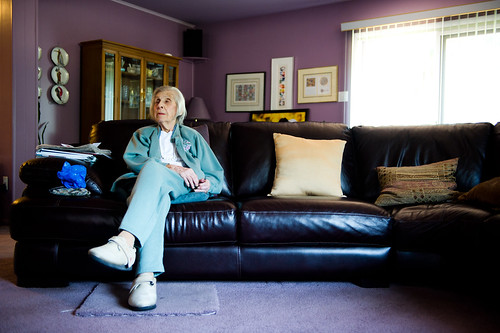
Example #6 JPEG “I get it right in the camera”
This is a sample of the jpeg right out of the camera with no tweaks other than the normal picture control settings. It looks pretty good until you see the raw file in the next image.

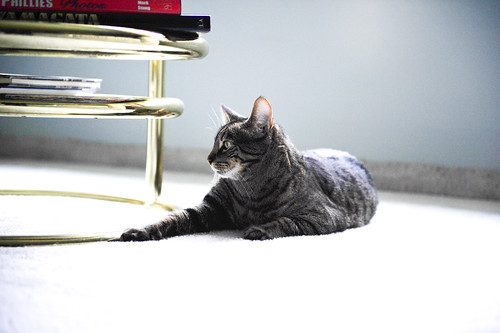
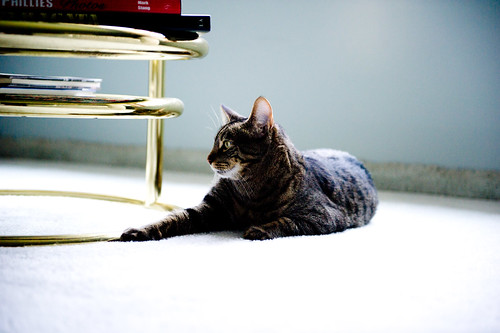
Example #6 RAW
This RAW file pops, the color of LIL is less flat and more dynamic. The color of the walls and carpet are more realistic to the way they actually are.
Example #7 JPEG “I get it right in the camera”
This is a jpeg out of the camera that is very very good. The colors are great and were pretty hard for me to replicate at first in the RAW file. I was able to bring the image to where I thought it met and beat the jpeg.
The question I get a lot is why would I shoot RAW + JPEG. One reason is if you are new to photo editing it is nice to have a reference to try and match and than make better. If this is you than i would shoot RAW and JPEG basic and just use the basic files for comparison.
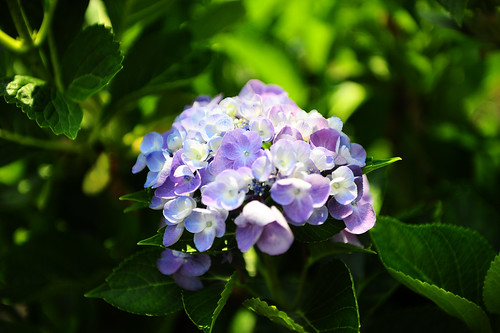
Example #7 RAW
This is the RAW file tweaked after using the jpeg as a comparison file. I like the range of color in the greens in the shadow are light areas. I feel this is a warmer image that is more representative of the actual real life environment.
The question I get a lot is why would I shoot RAW + JPEG. One reason is if you are new to photo editing it is nice to have a reference to try and match and than make better. If this is you than i would shoot RAW and JPEG basic and just use the basic files for comparison.