
Lightroom Sharpening Tutorial
Greg is back with another Lightroom video. This weeks topic is the basics of sharpening. Every image needs to be sharpened before you print or publish it online. The only people who wont be doing sharpening are the jpeg shooters because they are setting it before hand int he camera which is not recommended!!!
Greg goes over the basics of how each slider works in Lightroom some tips for better understanding what each one is doing to your image.
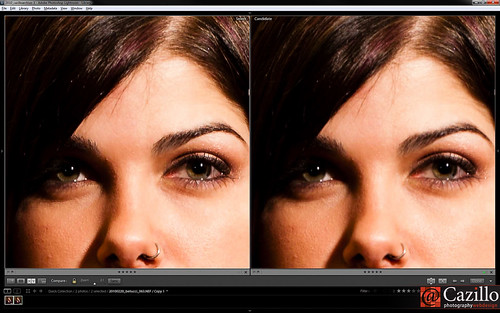
Sharpening can make or break your image, to much can make it look terrible to little can make it look unprofessional. You have to find that balance that works for your and your subject.
Objects are easier to work on compared to people. Getting the skin to not look over sharp and the eyes and lashes right on takes so work.
There is not one general setting you can apply that will work for every single image. Sure images that were taken in the studio that are similar may be able to use the same sharpening but many things can effect the sharpening.
Something Greg did not go over in this video is the export sharpening settings. Those are used for sharpening at export. When exporting you will apply just a little more sharpening. The difference is that in the Develop module you are capture sharpening, in other words improving the original file and perfecting it. When sharpening on export you are sharpening depending on the final file size. This makes a difference – that’s why there are multiple settings in LR for different file types in the Export dialog box.
You want a bit more export sharpening for the web/screen but print should be a bit less. Make sure to choose the right one and make sure you are happy with the file after export.
Click to see the full size image